My university, the University of Tampa, is doing what it can to continue teaching in-person classes (many are hybrid) during the COVID-19 pandemic. To facilitate that, our IT folks installed webcams and microphones in all of our classrooms. Unfortunately, the classrooms all have Windows-based desktops that don’t include all the software I need for educating my students (e.g., LibreOffice, Zotero, RStudio, etc.). I have always just plugged my laptop into an HDMI cable and then projected directly from it.
However, now that I’m teaching in a mask that substantially muffles my voice, I need a microphone that is projected through the speakers in the classroom so the students in the back can hear me, particularly when the A/C is on. I tried using the microphone provided the first day of class and ended up having to hold it for the entire class and it still cut out regularly. Our IT folks suggested we could start a Zoom meeting on the desktop, connect our laptop to it, and then display our laptop in the Zoom meeting and project that onto the screen so we can use our laptop and a microphone. That seemed like a kludge approach to solve the problem.
I figured there had to be a better way. So, I did a little thinking and a little research and found one. The answer – a bluetooth headset designed for truckers! Yep, truckers to the rescue!
If I could get a bluetooth headset to connect to my computer and then project the sound through the classroom’s speakers via bluetooth, I could continue to use my laptop to teach my class while still having a microphone to project my mask-muffled voice. Admittedly, this required a couple of hours of testing and some trial and error, but I got it working. Now, I have my own microphone set up for the classroom (I bring it with me) and can continue to use my laptop instead of the Windows-based PC.
So, how did I do it?
First, get yourself a bluetooth headset. I bought the Mpow M5 from Amazon. This is the perfect style headset as it has just one earphone, meaning I can still hear perfectly fine when students are talking to me in the classroom.
Second, connect the headset to your laptop. I’m going to assume your laptop has built-in bluetooth. Mine, a Dell Latitude 7390, does. Pairing it with my laptop was super easy. (If you don’t have bluetooth built-in, there are cheap USB bluetooth dongles you can buy as well.)
Third, the Linux part. I installed the package “blueman,” which provides a GUI interface for working with bluetooth devices. I didn’t know if this would be necessary, but, it turns out, it definitely was. Once you have your headset connected, open the blueman GUI and you’ll see this:
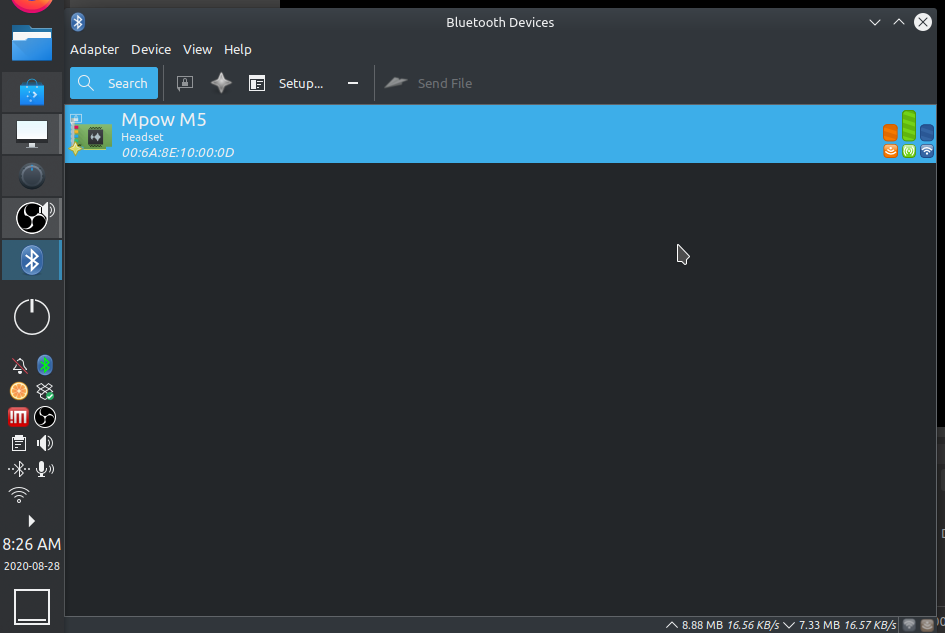
The next part stymied me for a while. Initially, my computer detected the headset as just headphones and not a headset with a microphone. I didn’t know why. Eventually, I got lucky and right-clicked on the Mpow M5 device in blueman and got a context window with the option I needed:

When you right-click on the device, you can select “Audio Profile” and then “Headset Head Unit”. The default, for some reason, was “High Fidelity Playback.” Once I did that, Linux detected the microphone.
Before you continue, make sure you have plugged in the HDMI cable as you’ll need that connected for the next part.
Next up was making sure all my audio settings were correct. This, too, took some trial and error. The settings window you need is paudio or Pulse Audio, which goes by different names in various versions of Linux. Regardless, here’s what the window looks like:
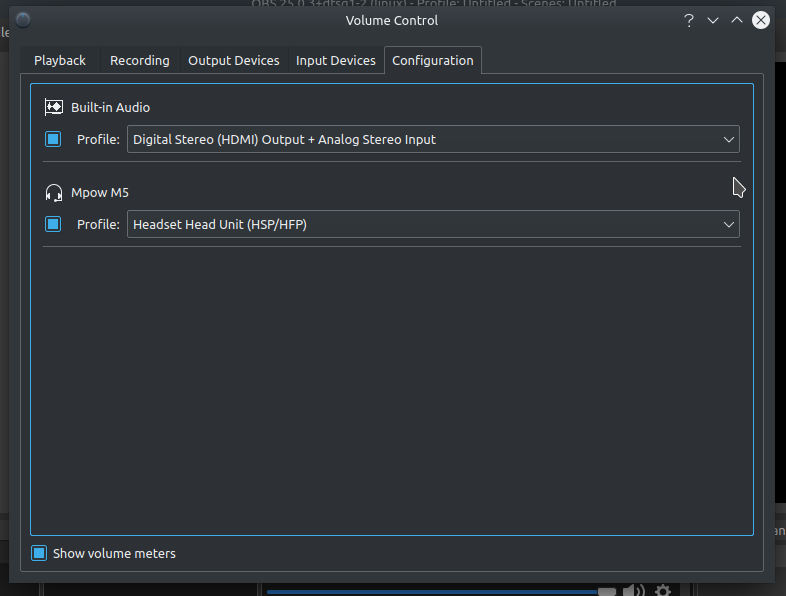
I’ll go over the settings for each tab, though the first two – Playback and Recording – won’t have anything in them until you start up OBS Studio, which I’ll cover shortly.
In the Configuration tab, you should now see your Mpow M5 connected as a Headset and you should see Built-in Audio. This may not say “Digital Stereo (HDMI) Output” to begin with. There is a drop down menu there. Click on it and you’ll see various options:
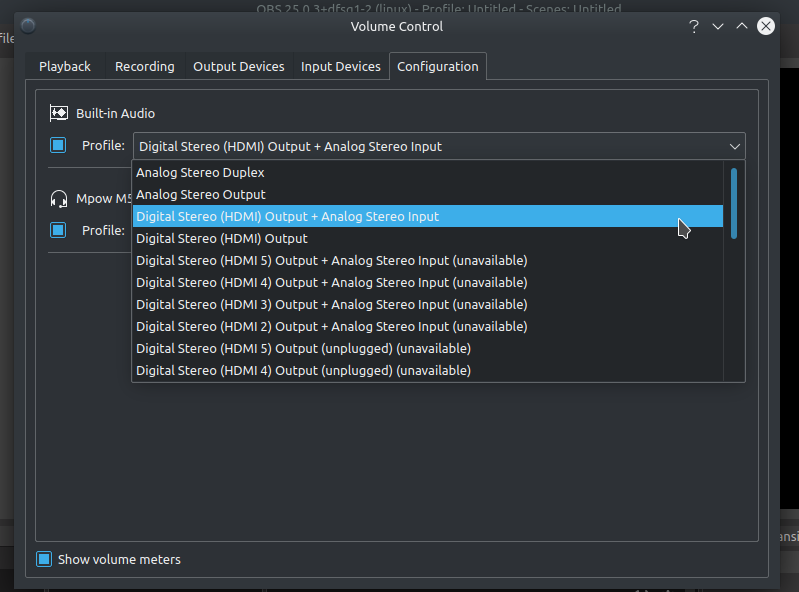
The default is “Analog Stereo Duplex”. Click on that drop down and select the HDMI Output. (NOTE: I typically use just “Digital Stereo (HDMI) Output” without the “+ Analog Stereo Input”. I have the wrong one highlighted above, but it should still work.)
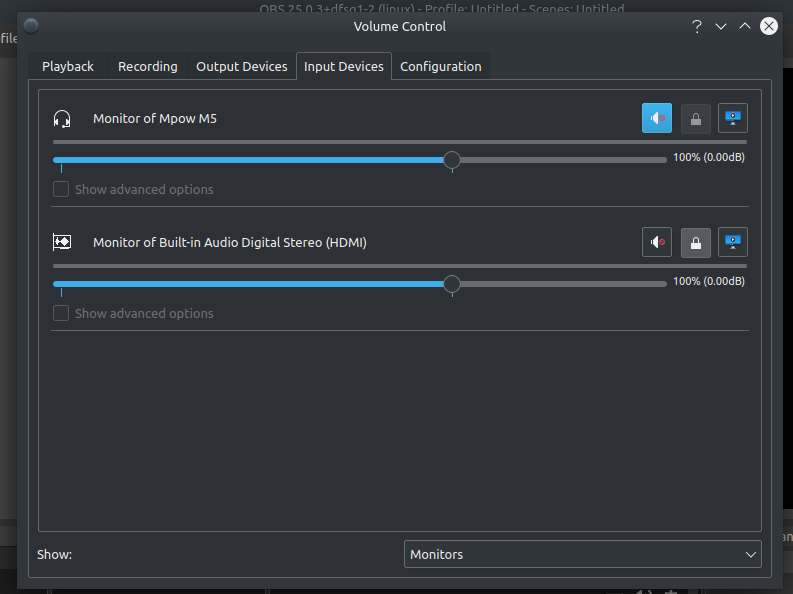
Here’s what the Input Devices tab should look like:
And here’s how the Output Devices tab should look:
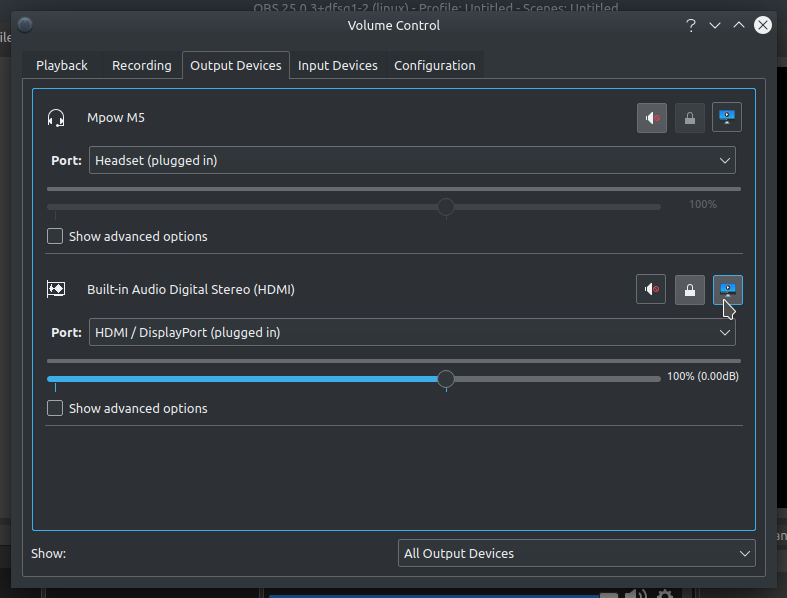
You probably will need to change one thing on the Output Devices tab. Make the HDMI output the default (click the little blue icon). You may also need to mute the Mpow M5 on this screen. Either way, you want to make sure that the HDMI output is where the sound is going.
Now, we need another piece of software. (NOTE: For those using Windows or Mac who want to do this as well, here’s the software that you’ll use that should use a fairly similar set up.) The software is OBS Studio, which is free and open-source software that works on all platforms. Install OBS Studio, then open it up.
The software is very good at detecting everything on your computer. Here are the settings I had to adjust. In the bottom right corner of the software, click on “Settings” and you’ll get a window with various tabs (tabs are on the right). The one you need is “Audio”. Click on that and you’ll see this:
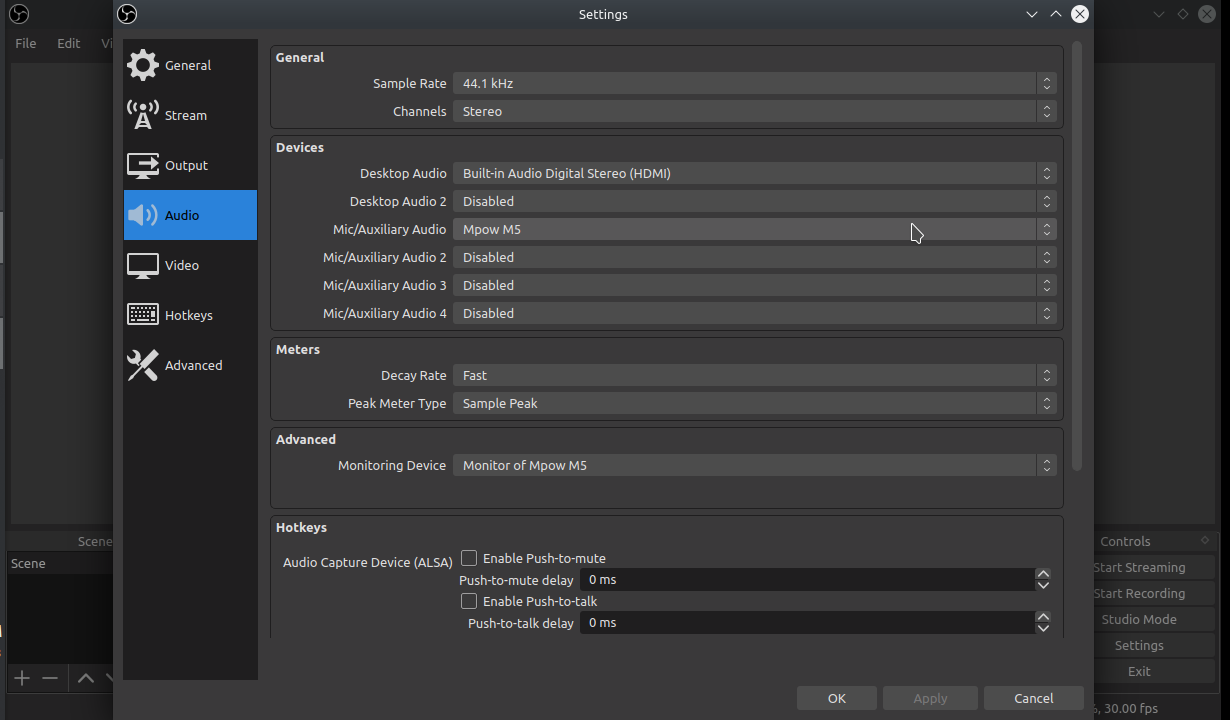
In the Devices section, you’ll need to change the following: “Desktop Audio” should be set to “Built-in Audio Digital Stereo (HDMI)”. “Desktop Audio 2” should be disabled. “Mic/Auxiliary Audio” should be set to “Mpow M5.” All the others should be disabled. Then, under “Advanced,” where it says “Monitoring Device,” select “Monitor of Mpow M5.” Then click Apply or OK.
Close that window then click on “Edit” -> “Advanced Audio Properties” and you’ll get this window:
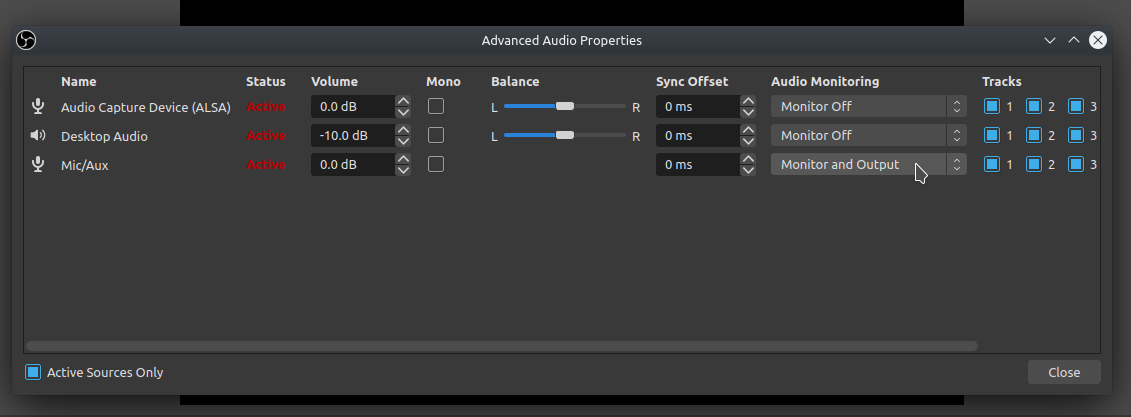
In that window, where you see “Audio Monitoring,” click on the drop down option for “Mic/Aux” and set it to “Monitor and Output.” What this does is tells the operating system that you want to monitor the audio from your Mpow M5 headset and output it through the speakers. Select “Close” and, assuming you’ve done everything correctly, you should now hear your voice coming out of the speakers. Woot!
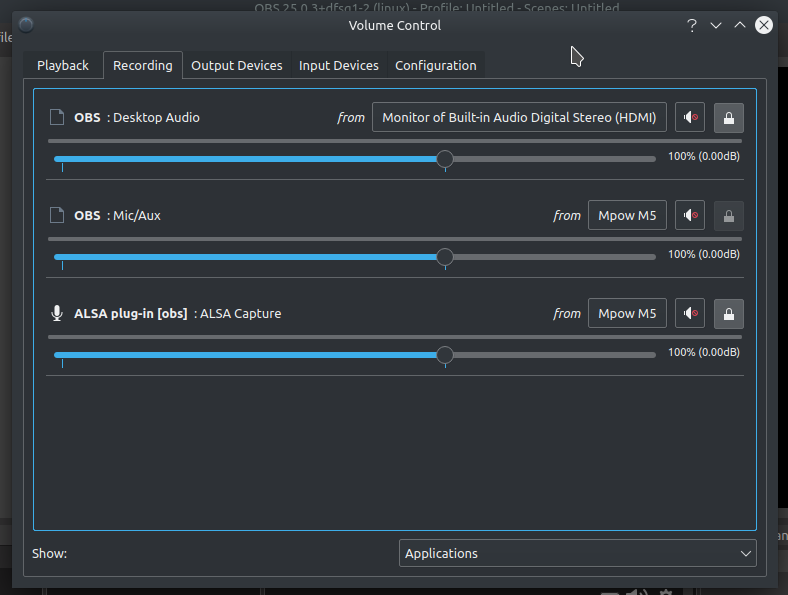
A little more detail may be helpful, though. Back to Linux. If you return to the Pulse Audio window, you’ll now see that there is information in the remaining two tabs. Here’s what you should see in the Recording tab:

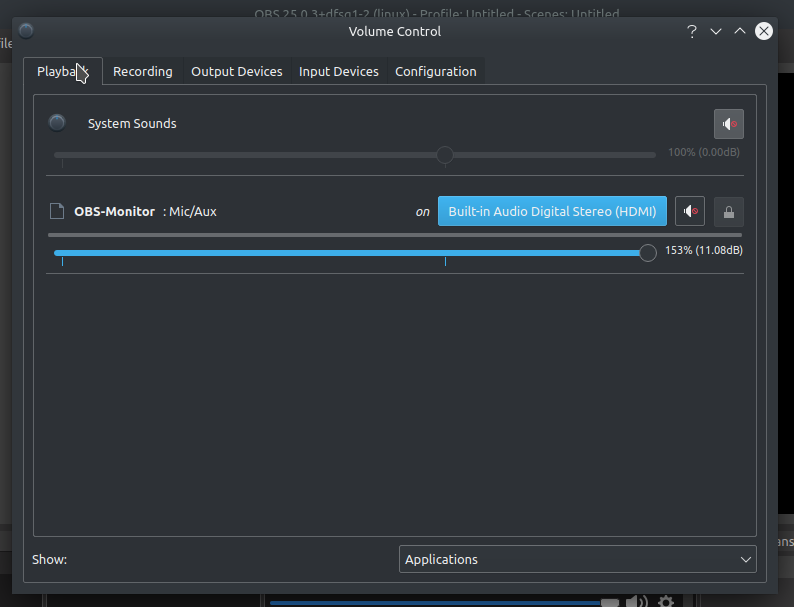
And here’s what you should see in the Playback tab:

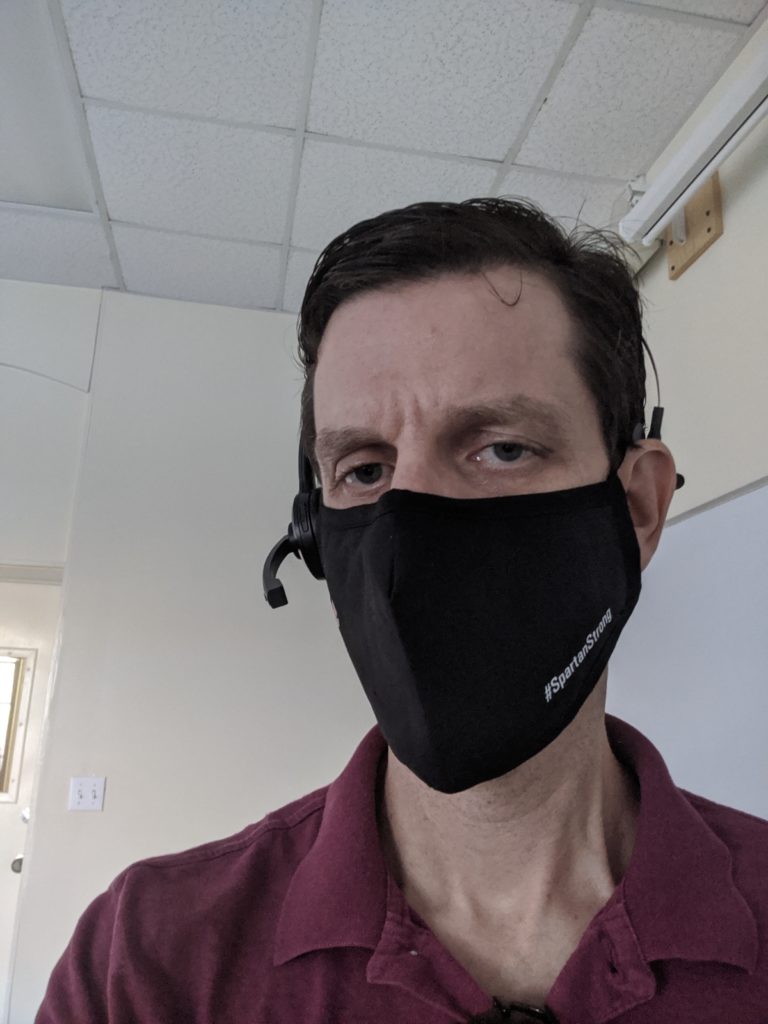
And here is how I look with my headset and a mask:

Some notes:
I haven’t tested this with Zoom yet. I probably will to make sure that the audio also goes through Zoom.
OBS Studio can actually be used to record your presentation as well. It’s designed for streaming gamers, but works just as well for screen capture. So, if you need to record your class, just use OBS Studio to record your audio and your screen during the class.
![]()
