While it’s possible to share your Garmin tracks or activities with people through the Garmin website, I like exporting my tracks to Google Maps so I can embed them on my website. Here’s how I do that.
First, log in to your Garmin Connect account. Once you have logged in, click on the Activities tab.
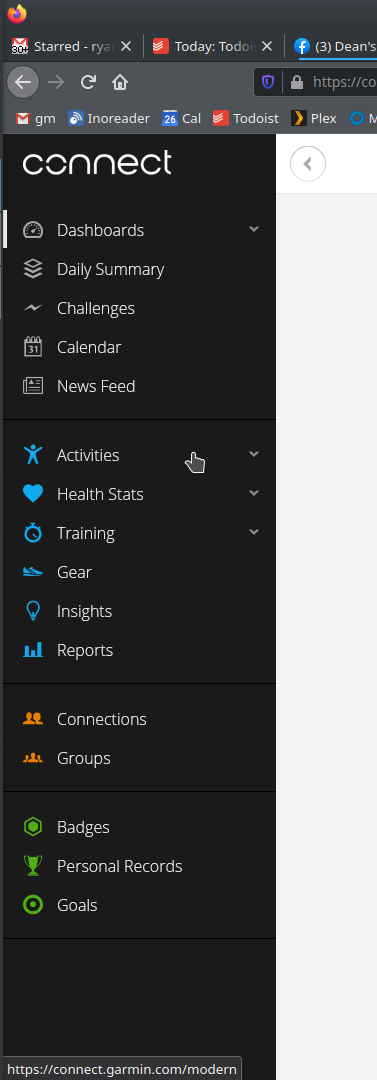
You’ll see a list of your activities. Look for and find the activity you want to share.
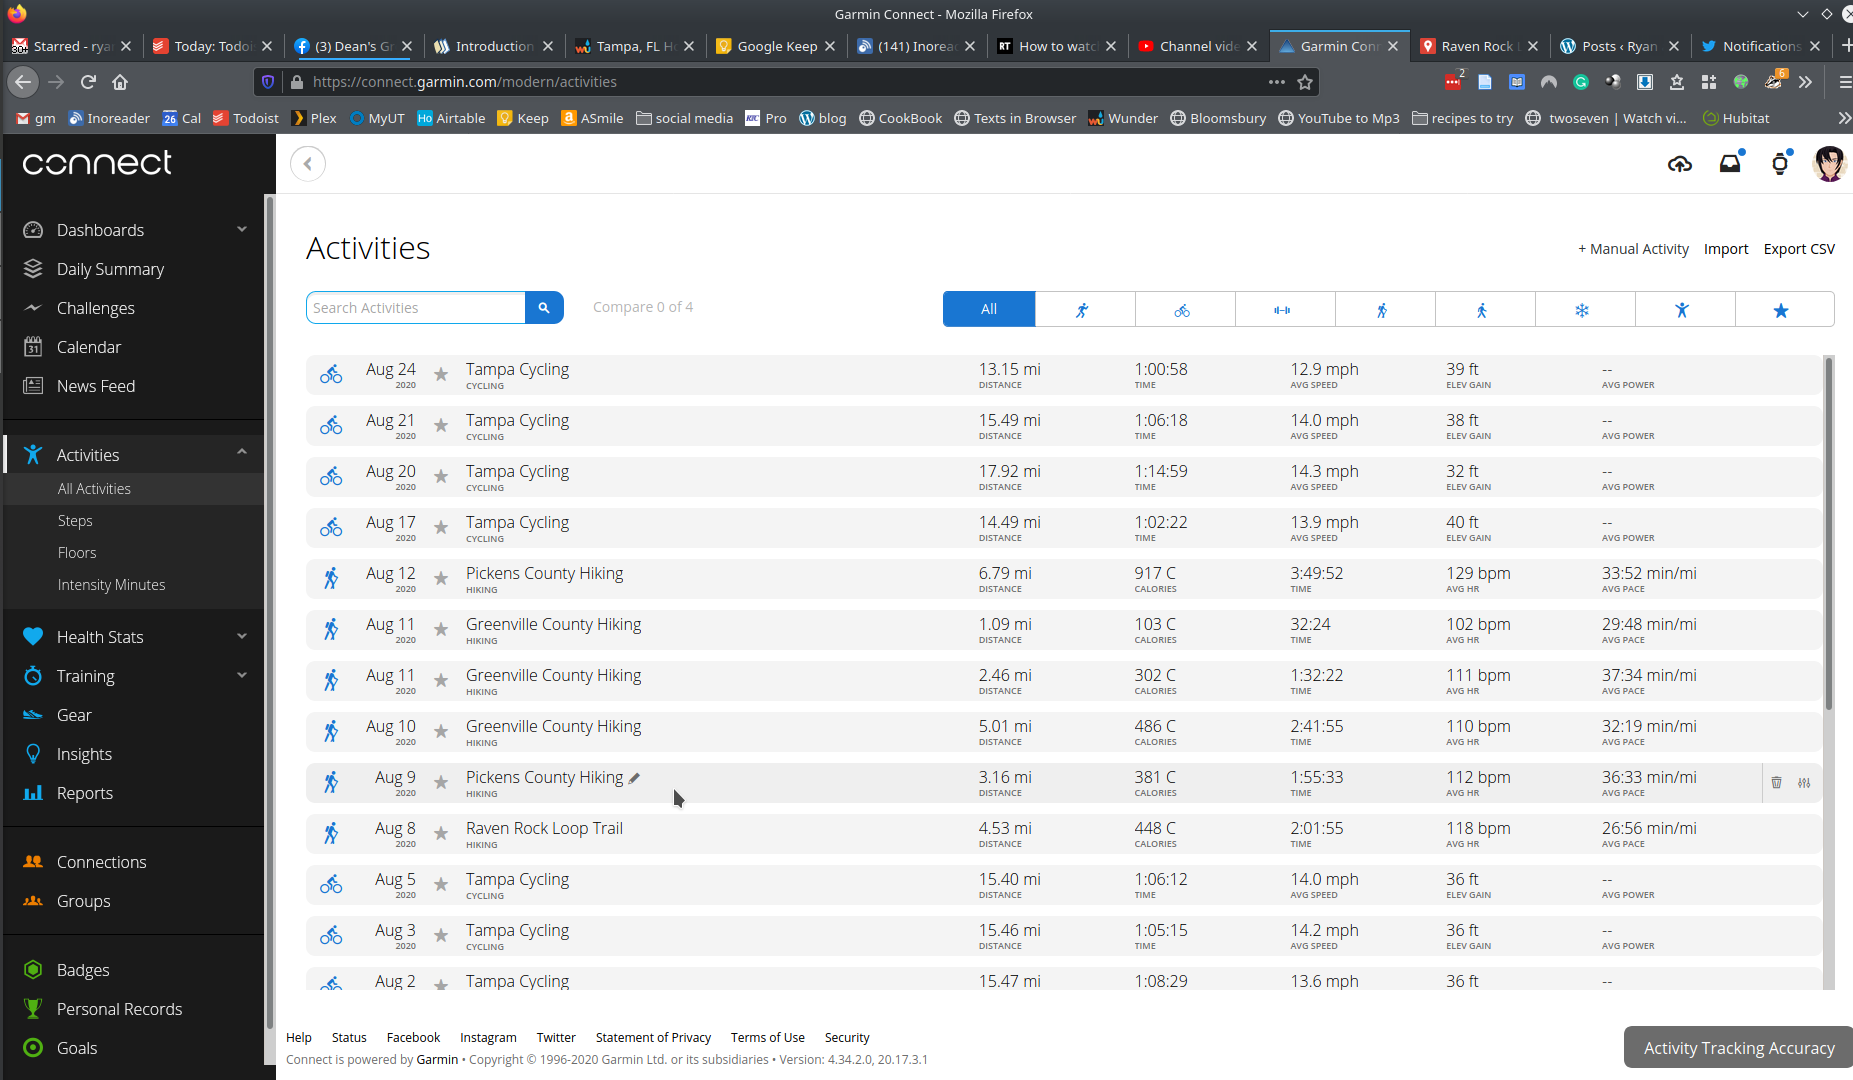
Click on the activity you want and you’ll see all the details for the activity. To export the GPS track of your activity, look for the gear icon on the upper right of the screen:

Click on the gear icon and you’ll see several options. The one you want is “Export to GPX.”
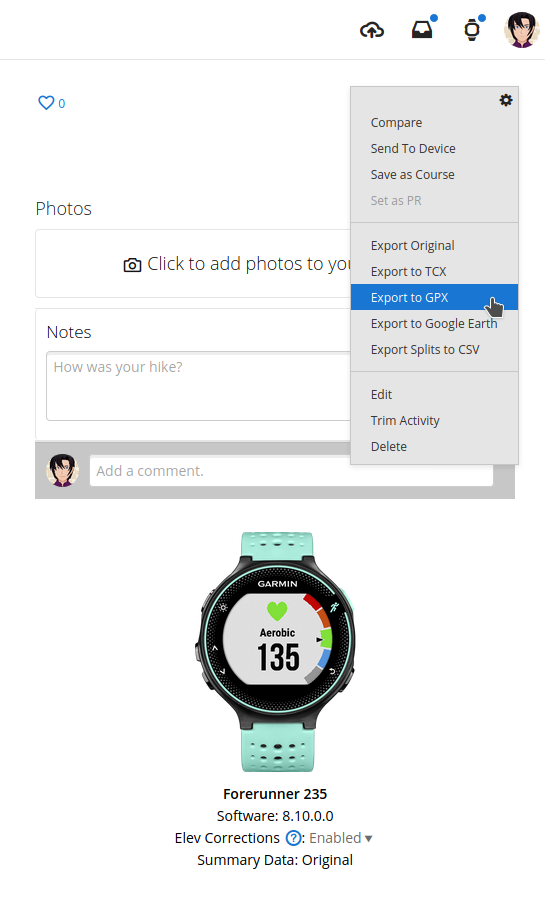
You should then get a prompt to download a GPX file. Download it to your computer (and, of course, remember where you downloaded it to). If you’re curious, you can open the GPX file with a text editor and see that it is basically just a list of points using a markup language.
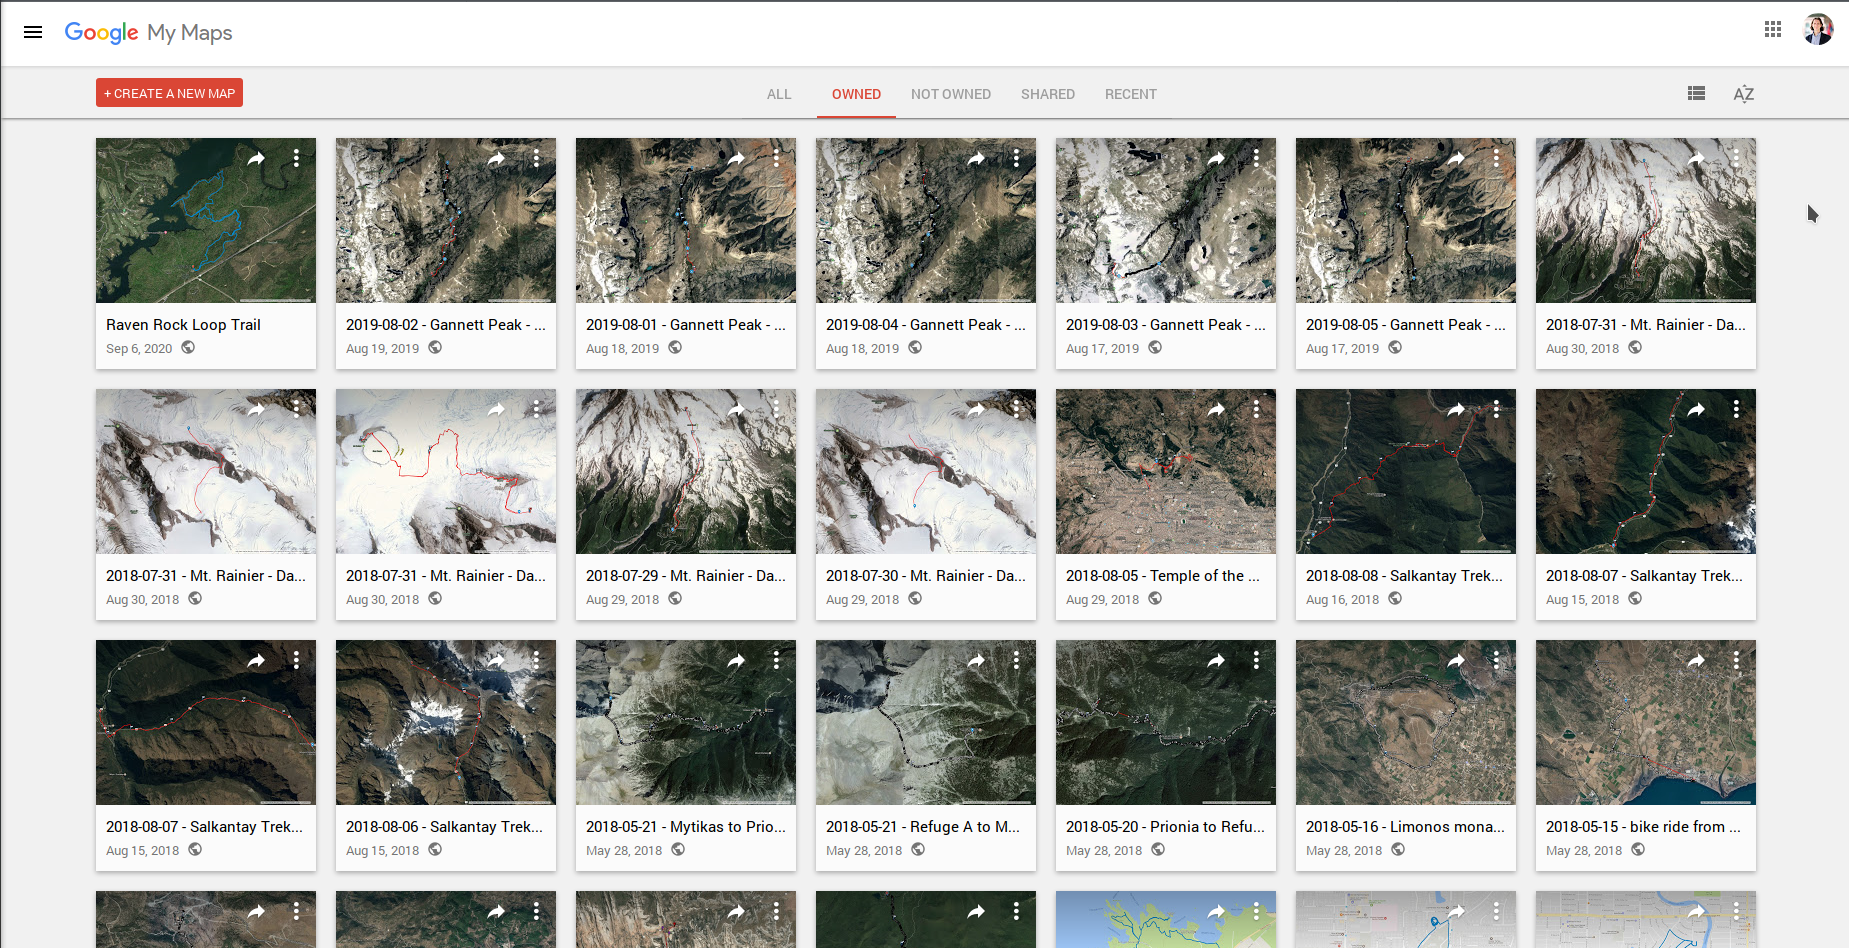
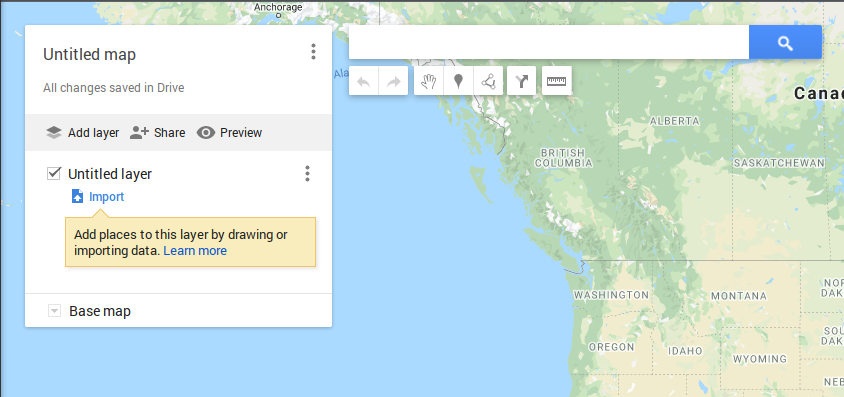
Now, log in to your Google account. The next part is always the part that takes me the longest when doing this – figuring out the URL where I can upload the GPX file to create a map. Google doesn’t make this easy (and, admittedly, it has changed over time). The link to upload and create maps using Google Maps is this one: https://www.google.com/maps/d/ Assuming you are signed in and everything works, you should see a page called “My Maps” that looks like this:
Click on “+CREATE A NEW MAP”, the big red button. On the next screen, you’ll see a checkbox next to “Untitled Layer” and below that a link that says “Import.”
Click on the “Import” link and you’ll get this window:
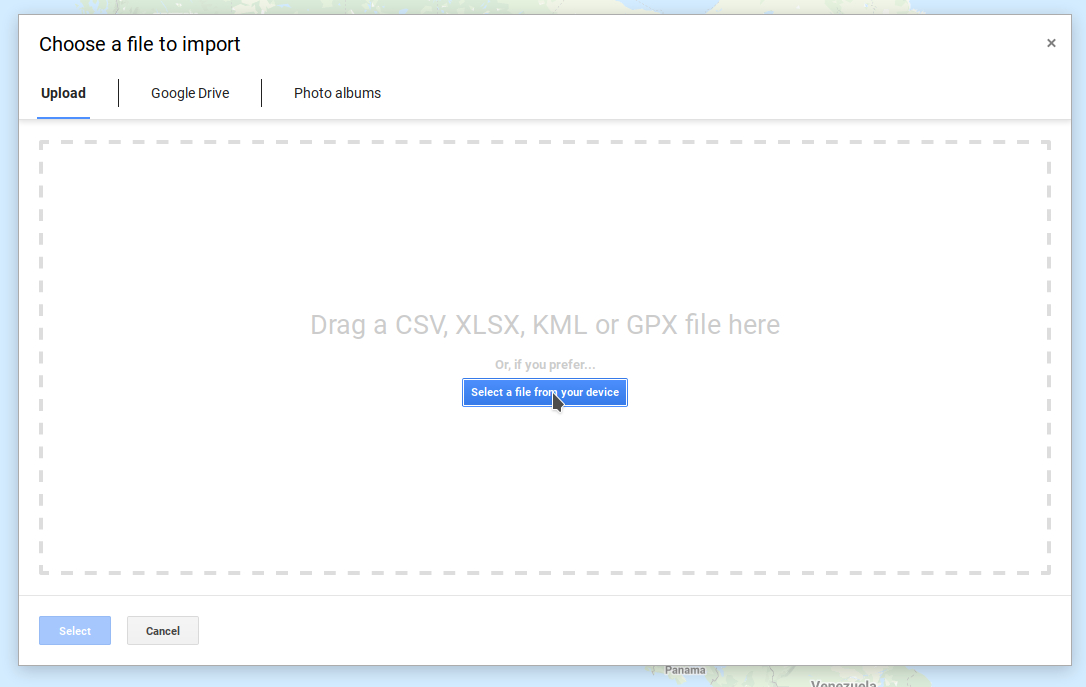
You can either click on the blue button and select your GPX file or just drag it to the window. Either way, as soon as it has been uploaded, the site will process it and overlay your track onto a map, like this:

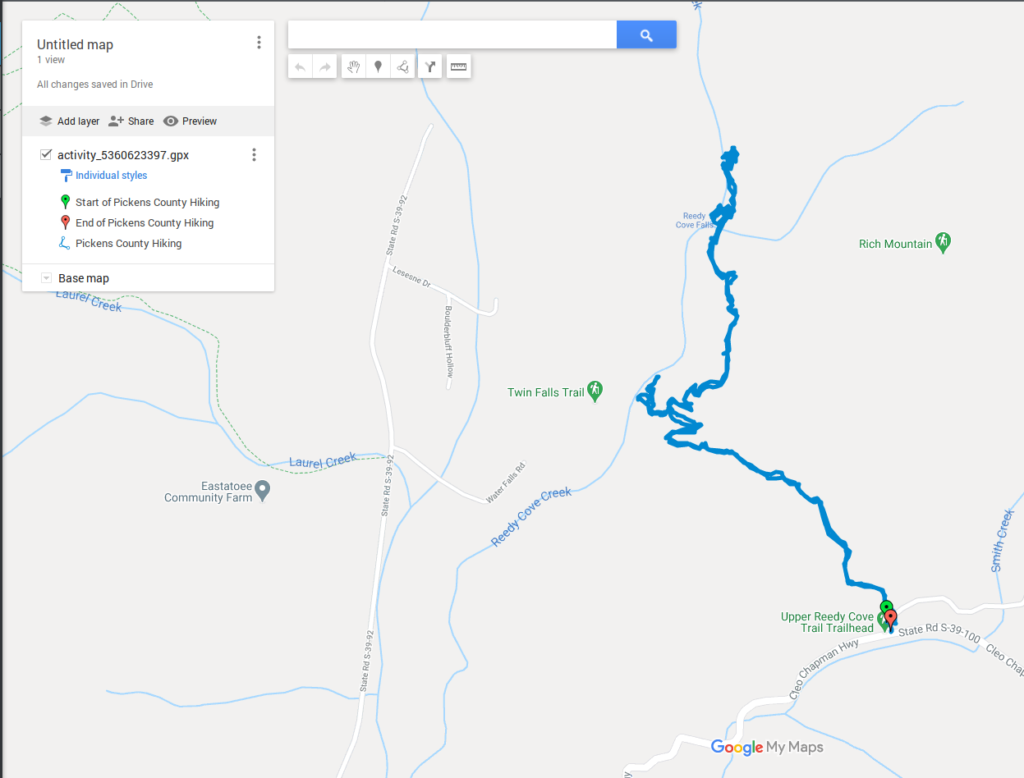
(BONUS: Since I have created quite a few of these for my hikes, I actually try to keep them organized in my Google Drive. If you’re going to create a lot of these, you should do the same.)
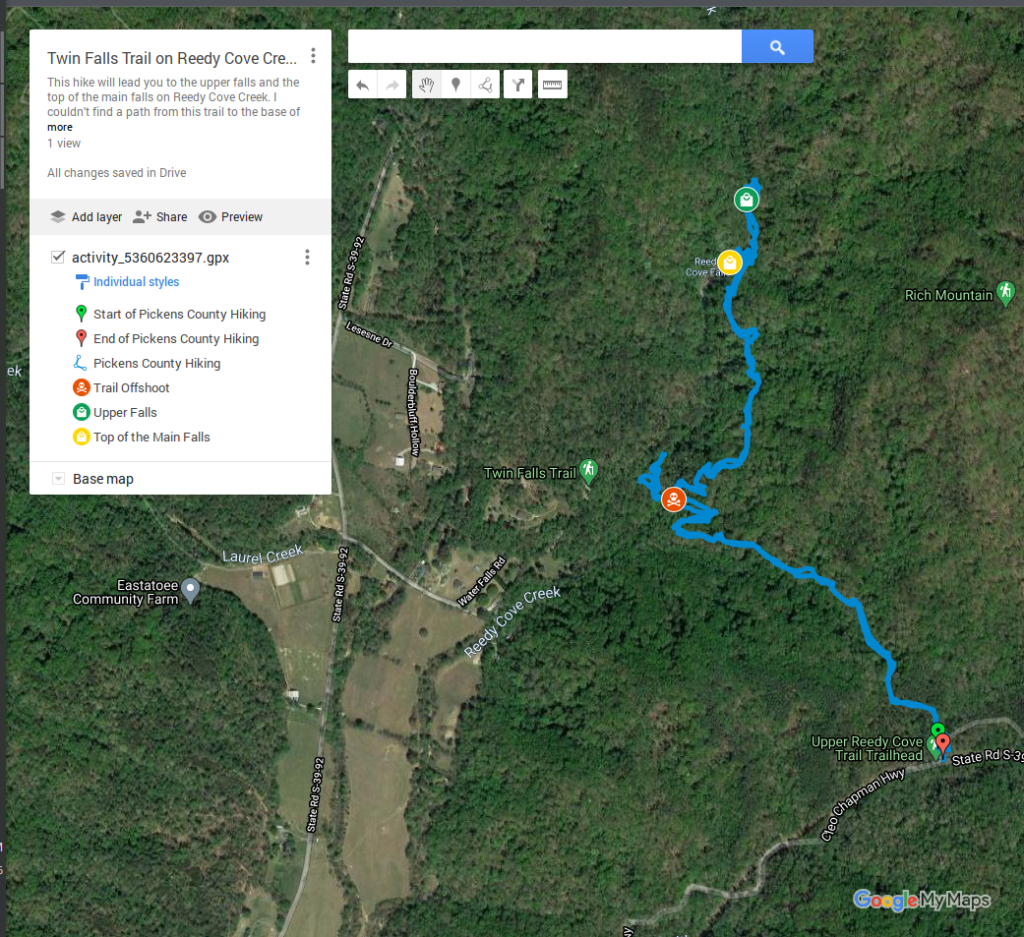
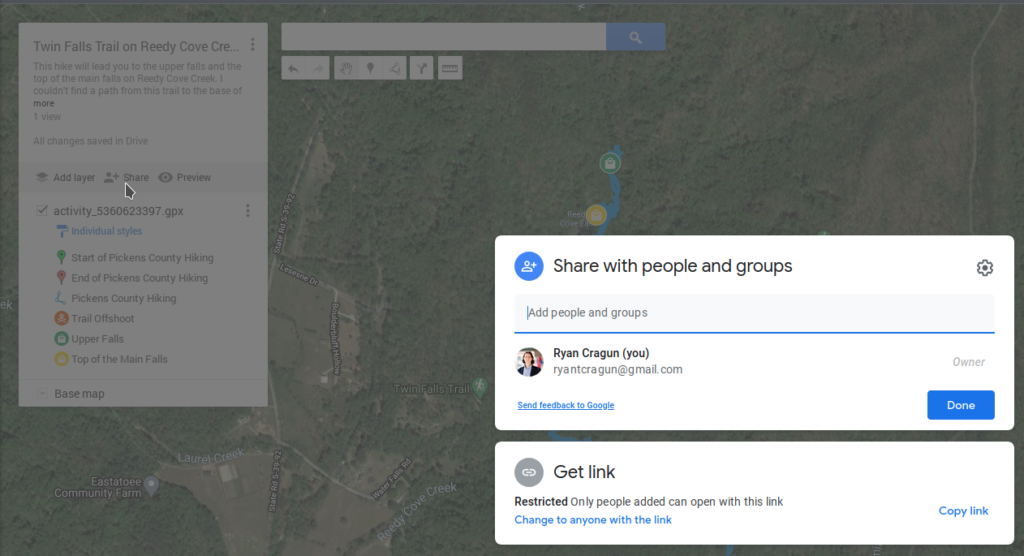
Now you have lots of options to customize your map. You should obviously click on where it says “Untitled map” and give it a name. You can also add layers, add points of interest, insert pins, etc. You can also change the Base map to terrain or satellite instead of the default map. I added three pins, a title, and a description to my map:

When you’re done modifying your map, you should do two things to share it. First, change the permissions by clicking on the “Share” icon.

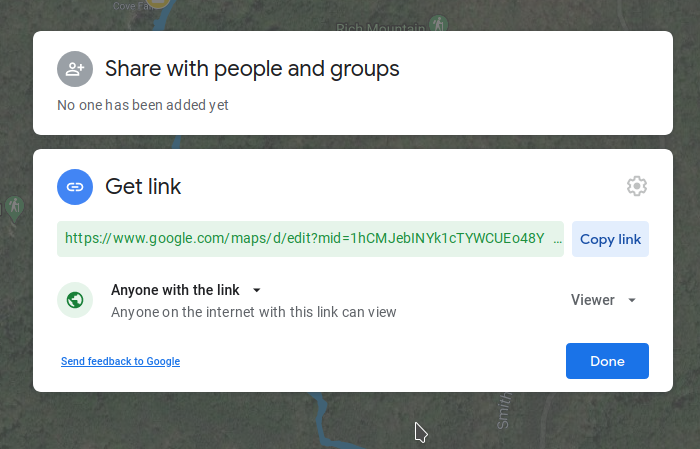
By default, maps are restricted and you can only provide access to specific people. You can change that by clicking at the bottom of that window where it says “Change to anyone with the link.”

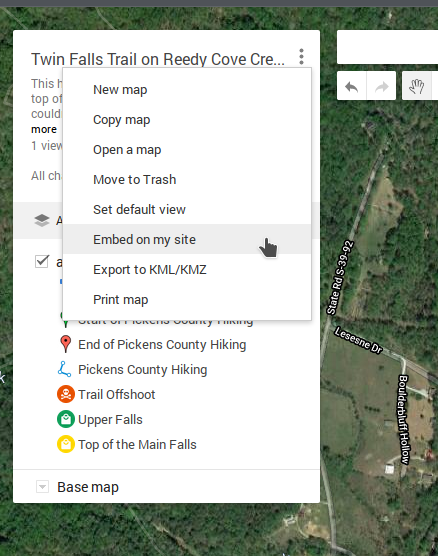
Now you can embed the map into a different website or just share the link with people. To embed the map, click the three little vertical dots near the title and select “Embed on my site”:

You’ll then get a window with the embed code:

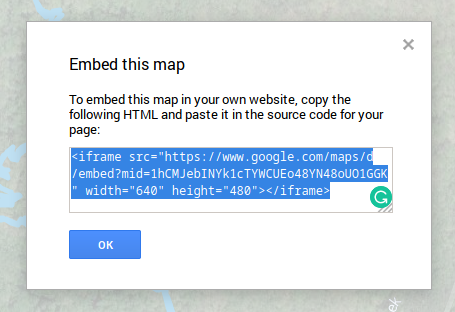
The code should look something like this:
<iframe src="https://www.google.com/maps/d/embed?mid=1hCMJebINYk1cTYWCUEo48YN48oUO1GGK" width="640" height="480"></iframe>And here’s how it looks actually embedded on your site:

![]()
