

I built my own Network Attached Storage (NAS) computer a few years ago but have been looking for an opportunity to upgrade the hard drives so I have more space. Leading up to Black Friday, I found a deal for 10TB drives that finally led me to pull the trigger (roughly $80 per drive). They were renewed drives, but I checked all their SMART properties and they were all good aside from having 40,000+ hours being powered up. So, now, how do I replace the hard disks and then update the sizes in my ZFS pool?
NOTE: This is being done on Xubuntu 22.04.2 LTS with zfsutils-linux and libzfs4linux version 2.1.501ubuntu6~22.04.2 installed.
Step 1 for me is always to make sure that everything is working okay. I logged into my fileserver and used the following command to check the status of my ZFS Raid:
zpool statusThis returned the following:
[USER]@CRAGUNNAS:~$ zpool status
  pool: ZFSNAS
 state: ONLINE
  scan: scrub repaired 0B in 07:35:57 with 0 errors on Sun Nov 12 07:59:58 2023
config:

        NAME        STATE     READ WRITE CKSUM
        ZFSNAS      ONLINE       0     0     0
          raidz2-0  ONLINE       0     0     0
            sdd     ONLINE       0     0     0
            sdb     ONLINE       0     0     0
            sde     ONLINE       0     0     0
            sdc     ONLINE       0     0     0

errors: No known data errors
All good. Now, how do we update the drives? Since it’s a RAID, I can effectively pull one drive, replace it, and then have the new drive updated with the old drive’s information from the three remaining drives (this is called “resilvering“). I wanted to make sure I did this the right way, however. The right way, I believe, is to take a drive offline, physically unplug the old drive, plug in the new drive, then replace the drive and start the resilvering process. Here’s how I did that.
First, it’s always a good idea to figure out the exact information for your physical drives, specifically the location as well as GUIDs and serial numbers so you know which drive you are pulling and replacing first. To start, I used the “zdb” command to get a detailed list of the drives and their corresponding information in my ZFS raid:
[USER]@CRAGUNNAS:~$ zdb
ZFSNAS:
    version: 5000
    name: 'ZFSNAS'
    state: 0
    txg: 29023575
    pool_guid: 11715369608980340525
    errata: 0
    hostid: 1301556755
    hostname: 'CRAGUNNAS'
    com.delphix:has_per_vdev_zaps
    vdev_children: 1
    vdev_tree:
        type: 'root'
        id: 0
        guid: 11715369608980340525
        children[0]:
            type: 'raidz'
            id: 0
            guid: 5572127212209335577
            nparity: 2
            metaslab_array: 134
            metaslab_shift: 37
            ashift: 12
            asize: 16003087990784
            is_log: 0
            create_txg: 4
            com.delphix:vdev_zap_top: 129
            children[0]:
                type: 'disk'
                id: 0
                guid: 4538970697913397640
                path: '/dev/sdd1'
                whole_disk: 1
                DTL: 425
                create_txg: 4
                com.delphix:vdev_zap_leaf: 130
            children[1]:
                type: 'disk'
                id: 1
                guid: 6966864497020594263
                path: '/dev/sdb1'
                whole_disk: 1
                DTL: 423
                create_txg: 4
                com.delphix:vdev_zap_leaf: 131
            children[2]:
                type: 'disk'
                id: 2
                guid: 17257968135348066266
                path: '/dev/sde1'
                whole_disk: 1
                DTL: 422
                create_txg: 4
                com.delphix:vdev_zap_leaf: 132
            children[3]:
                type: 'disk'
                id: 3
                guid: 16708097589261153782
                path: '/dev/sdc1'
                whole_disk: 1
                DTL: 420
                create_txg: 4
                com.delphix:vdev_zap_leaf: 133
    features_for_read:
        com.delphix:hole_birth
        com.delphix:embedded_data
This makes it clear that I have four drives with the specific paths:
/dev/sdd1
/dev/sdb1
/dev/sde1
/dev/sdc1
Now, to make sure I offline the drive I want and then physically unplug and replace that drive, I wanted the Serial Number of the drive so I could check it when replacing the drive. To get that, I used the “smartmontools” package:
sudo apt-get install smartmontoolsWith that package installed, I wanted the SMART information from the second drive, /dev/sdb1 (Why the second drive? Complicated for reasons irrelevant to this tutorial. But, you can start with any one of them.). Here’s the command I used to get it:
sudo smartctl -a /dev/sdb1And the output:
[USER]@CRAGUNNAS:~$ sudo smartctl -a /dev/sdb1
smartctl 7.2 2020-12-30 r5155 [x86_64-linux-6.2.0-34-generic] (local build)
Copyright (C) 2002-20, Bruce Allen, Christian Franke, www.smartmontools.org

=== START OF INFORMATION SECTION ===
Model Family:     Western Digital Blue
Device Model:     WDC WD40EZRZ-00GXCB0
Serial Number:    WD-WCC7K6XTEZ14
LU WWN Device Id: 5 0014ee 265ec058c
Firmware Version: 80.00A80
User Capacity:    4,000,787,030,016 bytes [4.00 TB]
Sector Sizes:     512 bytes logical, 4096 bytes physical
Rotation Rate:    5400 rpm
Form Factor:      3.5 inches
Device is:        In smartctl database [for details use: -P show]
ATA Version is:   ACS-3 T13/2161-D revision 5
SATA Version is:  SATA 3.1, 6.0 Gb/s (current: 6.0 Gb/s)
Local Time is:    Wed Nov 22 10:23:07 2023 EST
SMART support is: Available - device has SMART capability.
SMART support is: Enabled

=== START OF READ SMART DATA SECTION ===
SMART overall-health self-assessment test result: PASSED

General SMART Values:
Offline data collection status:  (0x84) Offline data collection activity
                                        was suspended by an interrupting command from host.
                                        Auto Offline Data Collection: Enabled.
Self-test execution status:      (   0) The previous self-test routine completed
                                        without error or no self-test has ever
                                        been run.
Total time to complete Offline
data collection:                (44340) seconds.
Offline data collection
capabilities:                    (0x7b) SMART execute Offline immediate.
                                        Auto Offline data collection on/off support.
                                        Suspend Offline collection upon new
                                        command.
                                        Offline surface scan supported.
                                        Self-test supported.
                                        Conveyance Self-test supported.
                                        Selective Self-test supported.
SMART capabilities:            (0x0003) Saves SMART data before entering
                                        power-saving mode.
                                        Supports SMART auto save timer.
Error logging capability:        (0x01) Error logging supported.
                                        General Purpose Logging supported.
Short self-test routine
recommended polling time:        (   2) minutes.
Extended self-test routine
recommended polling time:        ( 470) minutes.
Conveyance self-test routine
recommended polling time:        (   5) minutes.
SCT capabilities:              (0x3035) SCT Status supported.
                                        SCT Feature Control supported.
                                        SCT Data Table supported.

SMART Attributes Data Structure revision number: 16
Vendor Specific SMART Attributes with Thresholds:
ID# ATTRIBUTE_NAME          FLAG     VALUE WORST THRESH TYPE      UPDATED  WHEN_FAILED RAW_VALUE
  1 Raw_Read_Error_Rate     0x002f   200   200   051    Pre-fail  Always       -       0
  3 Spin_Up_Time            0x0027   189   164   021    Pre-fail  Always       -       5516
  4 Start_Stop_Count        0x0032   100   100   000    Old_age   Always       -       56
  5 Reallocated_Sector_Ct   0x0033   200   200   140    Pre-fail  Always       -       0
  7 Seek_Error_Rate         0x002e   100   253   000    Old_age   Always       -       0
  9 Power_On_Hours          0x0032   043   043   000    Old_age   Always       -       42240
 10 Spin_Retry_Count        0x0032   100   253   000    Old_age   Always       -       0
 11 Calibration_Retry_Count 0x0032   100   253   000    Old_age   Always       -       0
 12 Power_Cycle_Count       0x0032   100   100   000    Old_age   Always       -       56
192 Power-Off_Retract_Count 0x0032   200   200   000    Old_age   Always       -       37
193 Load_Cycle_Count        0x0032   001   001   000    Old_age   Always       -       743138
194 Temperature_Celsius     0x0022   111   103   000    Old_age   Always       -       39
196 Reallocated_Event_Count 0x0032   200   200   000    Old_age   Always       -       0
197 Current_Pending_Sector  0x0032   200   200   000    Old_age   Always       -       0
198 Offline_Uncorrectable   0x0030   200   200   000    Old_age   Offline      -       0
199 UDMA_CRC_Error_Count    0x0032   200   200   000    Old_age   Always       -       6
200 Multi_Zone_Error_Rate   0x0008   200   200   000    Old_age   Offline      -       0

SMART Error Log Version: 1
No Errors Logged

SMART Self-test log structure revision number 1
Num  Test_Description    Status                  Remaining  LifeTime(hours)  LBA_of_first_error
# 1  Short offline       Completed without error       00%     16888         -

SMART Selective self-test log data structure revision number 1
 SPAN  MIN_LBA  MAX_LBA  CURRENT_TEST_STATUS
    1        0        0  Not_testing
    2        0        0  Not_testing
    3        0        0  Not_testing
    4        0        0  Not_testing
    5        0        0  Not_testing
Selective self-test flags (0x0):
  After scanning selected spans, do NOT read-scan remainder of disk.
If Selective self-test is pending on power-up, resume after 0 minute delay.
That’s a lot of information, but what I was really looking for was the Serial number:
WD-WCC7K6XTEZ14.
NOTE: You can get just the serial number if you use the following:
sudo smartctl -a /dev/sdb1 | grep "Serial Number"Now, let’s offline the drive we want to replace first. Here’s the code for that:
sudo zpool offline ZFSNAS /dev/sdb1You won’t get any output when you do this, so to see if it worked, check your zpool status again:
[USER]@CRAGUNNAS:~$ zpool status
  pool: ZFSNAS
 state: DEGRADED
status: One or more devices has been taken offline by the administrator.
        Sufficient replicas exist for the pool to continue functioning in a
        degraded state.
action: Online the device using 'zpool online' or replace the device with
        'zpool replace'.
  scan: scrub repaired 0B in 07:35:57 with 0 errors on Sun Nov 12 07:59:58 2023
config:

        NAME        STATE     READ WRITE CKSUM
        ZFSNAS      DEGRADED     0     0     0
          raidz2-0  DEGRADED     0     0     0
            sdd     ONLINE       0     0     0
            sdb     OFFLINE      0     0     0
            sde     ONLINE       0     0     0
            sdc     ONLINE       0     0     0

errors: No known data errors
I really appreciated the helpful information that is included here. I can, at this point, bring the disk back online using the zpool online command (sudo zpool online ZFSNAS /dev/sdb1). But, I want to replace the disk. So, my next step was to power down the fileserver, pull the drive I wanted to replace (checking the Serial Number to make sure it’s the right drive), and replace it with the new one. I powered down, found the correct drive, unplugged it, and put in the new drive.
(Skip several hours of troubleshooting a tangential issue…)
When the computer came back up, here is what I saw when I checked the pool status:
[USER]@CRAGUNNAS:~$ zpool status
  pool: ZFSNAS
 state: DEGRADED
status: One or more devices could not be used because the label is missing or
        invalid.  Sufficient replicas exist for the pool to continue
        functioning in a degraded state.
action: Replace the device using 'zpool replace'.
   see: https://openzfs.github.io/openzfs-docs/msg/ZFS-8000-4J
  scan: scrub in progress since Wed Nov 22 14:43:10 2023
        594G scanned at 18.6G/s, 36K issued at 1.12K/s, 11.7T total
        0B repaired, 0.00% done, no estimated completion time
config:

        NAME                     STATE     READ WRITE CKSUM
        ZFSNAS                   DEGRADED     0     0     0
          raidz2-0               DEGRADED     0     0     0
            sdd                  ONLINE       0     0     0
            6966864497020594263  UNAVAIL      0     0     0  was /dev/sdb1
            sde                  ONLINE       0     0     0
            sdc                  ONLINE       0     0     0

errors: No known data errors
Okay. This is expected. What I needed to do next was to make sure that the computer could see my newly attached drive, so I checked the list of attached drives with “lsblk”:
[USER]@CRAGUNNAS:~$ lsblk
NAME   MAJ:MIN RM   SIZE RO TYPE MOUNTPOINTS
loop0    7:0    0     4K  1 loop /snap/bare/5
loop1    7:1    0  63.4M  1 loop /snap/core20/1974
loop2    7:2    0  63.5M  1 loop /snap/core20/2015
loop3    7:3    0  73.9M  1 loop /snap/core22/864
loop4    7:4    0 240.3M  1 loop /snap/firefox/3290
loop5    7:5    0 240.3M  1 loop /snap/firefox/3358
loop6    7:6    0 346.3M  1 loop /snap/gnome-3-38-2004/119
loop7    7:7    0 349.7M  1 loop /snap/gnome-3-38-2004/143
loop8    7:8    0 496.9M  1 loop /snap/gnome-42-2204/132
loop9    7:9    0   497M  1 loop /snap/gnome-42-2204/141
loop10   7:10   0  91.7M  1 loop /snap/gtk-common-themes/1535
loop11   7:11   0  40.8M  1 loop /snap/snapd/20092
loop12   7:12   0  40.9M  1 loop /snap/snapd/20290
sda      8:0    0 447.1G  0 disk
├─sda1   8:1    0   512M  0 part /boot/efi
└─sda2   8:2    0 446.6G  0 part /var/snap/firefox/common/host-hunspell
                                 /
sdb      8:16   0   9.1T  0 disk
└─sdb1   8:17   0   9.1T  0 part
sdc      8:32   0   3.6T  0 disk
├─sdc1   8:33   0   3.6T  0 part
└─sdc9   8:41   0     8M  0 part
sdd      8:48   0   3.6T  0 disk
├─sdd1   8:49   0   3.6T  0 part
└─sdd9   8:57   0     8M  0 part
sde      8:64   0   3.6T  0 disk
├─sde1   8:65   0   3.6T  0 part
└─sde9   8:73   0     8M  0 part
Sure enough, now the computer can see my new drive (I added the highlighting). I just need to tell ZFS to replace the old drive with the new one. Here’s the command that I used:
sudo zpool replace -f ZFSNAS 6966864497020594263 /dev/sdb1Let me break down the command. “sudo” should be obvious (gives me root access). “zpool” indicates that I am working with my ZFS pool. “replace” indicates that I want to replace one of the drives. The “-f” is necessary to override any file system or partitions on the new drive. It’s effectively a “force” flag that tells ZFS it’s okay to go ahead and make the change. “ZFSNAS” is the name of my pool. The big long number is the name of the storage device that I am replacing. And, finally, “dev/sdb1” is the new drive I want to use to replace it.
Once you hit ENTER, you’ll probably get a pause while this command starts, then, nothing. To see that it is working, use “zpool status” again:
ryan@CRAGUNNAS:~$ zpool status
  pool: ZFSNAS
 state: DEGRADED
status: One or more devices is currently being resilvered.  The pool will
        continue to function, possibly in a degraded state.
action: Wait for the resilver to complete.
  scan: resilver in progress since Wed Nov 22 15:04:22 2023
        6.31T scanned at 7.19G/s, 299G issued at 340M/s, 11.7T total
        72.4G resilvered, 2.50% done, 09:44:14 to go
config:

        NAME                       STATE     READ WRITE CKSUM
        ZFSNAS                     DEGRADED     0     0     0
          raidz2-0                 DEGRADED     0     0     0
            sdd                    ONLINE       0     0     0
            replacing-1            DEGRADED     0     0     0
              6966864497020594263  UNAVAIL      0     0     0  was /dev/sdb1/old
              sdb1                 ONLINE       0     0     0  (resilvering)
            sde                    ONLINE       0     0     0
            sdc                    ONLINE       0     0     0

errors: No known data errors
There’s a lot of information here. This indicates that it found the new drive and is transferring the different files from the other drives to the new drive to recreate my RAID. Under “action” it indicates that a resilvering is in progress: “Wait for the resilver to complete.” The “scan” indicates how much is done and how long it will take – another 10 hours or so. Once the resilvering is done, I can then replace another drive by repeating the process until I have replaced all four drives. If you want to watch the process, you can use this command (stole this from here):
watch zpool status ZFSNAS -vThis will update your terminal every 2 seconds as the resilvering takes place. Honestly, I just let mine run in the background overnight.
Intriguingly, it was only with the first one that it replaced the former name of the drive (sdb) with the numbers noted above. With all the other drives, it showed their former assigned drive letter. As a result, my “replace” command typically looked like this:
sudo zpool status replace -f ZFSNAS sdc /dev/sdcAfter the first one finished, I ran through the same process to swap out the other three drives. It took roughly 10 hours per drive (so, about 40 hours total).
Of course, the whole reason for this was to increase the size of the ZFS Raid. After swapping out all of the drives, I checked the size of my pool:
zpool listHere is what I got back:
[USER]@CRAGUNNAS:~$ zpool list
NAME     SIZE  ALLOC   FREE  CKPOINT  EXPANDSZ   FRAG    CAP  DEDUP    HEALTH
ZFSNAS  14.5T  11.7T  2.84T        -     21.8T    17%    80%  1.00x    ONLINE
The current size of my pool is 14.5T, with 2.84T free. But I just swapped in four, 10T drives. ZFS didn’t update the size of my drives or my RAID while replacing the old drives with the newer, bigger drives (though the EXPANDSZ suggests that it is aware the RAID can be expanded). To do that, I ran the following:
sudo zpool set autoexpand=on ZFSNAS
sudo zpool online -e ZFSNAS sdd
Running the first command didn’t change anything (not sure if it’s necessary). The second command is what seemed to really work. After I ran that second command, then re-ran “zpool list,” the available space on the drive was updated:
[USER]@CRAGUNNAS:~$ zpool list
NAME SIZE ALLOC FREE CKPOINT EXPANDSZ FRAG CAP DEDUP HEALTH
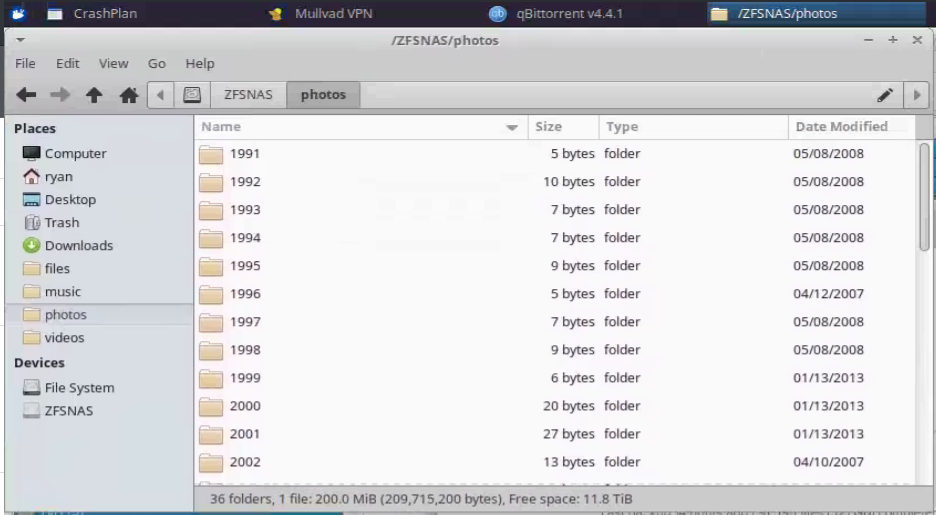
ZFSNAS 36.4T 11.7T 24.7T - - 6% 32% 1.00x ONLINEJust to make extra certain that it had updated the available space, I opened a file manager on that computer after I had remotely logged in and checked the available space. Sure enough, it was ~2T before the upgrade. Now, I have 11.8T free:

At this point, I was basically done with the upgrade. But, I wanted to make extra sure everything was fine, so I ran a “scrub” just to be extra cautious:
sudo zpool scrub ZFSNASThe scrub took another 5 hours but, no errors. I randomly checked a number of my files on the ZFS RAID to make sure everything was working fine and, no problems from what I could tell. I think this was a success. If I run into any issues in the future, I’ll be sure to come back and update this post.
(NOTE: I drew on these websites to figure this out: here, here, and here.)
![]()
