After about a year and a half with my previous NAS (see here), I decided it was time for an upgrade. The previous NAS had served dutifully, but it was no match for 4K video (I don’t have a lot of it), it took forever to transcode files when I wanted to synchronize them with a device using Plex, and it couldn’t transcode pretty much any videos in real-time. For playing up to four files simultaneously that didn’t need to be transcoded, it worked like a champ. But it just couldn’t handle all the scenarios I was throwing at it. So, it was time for an upgrade.
Hardware
The major change, of course, was the hardware. Here are the specs for the new NAS:
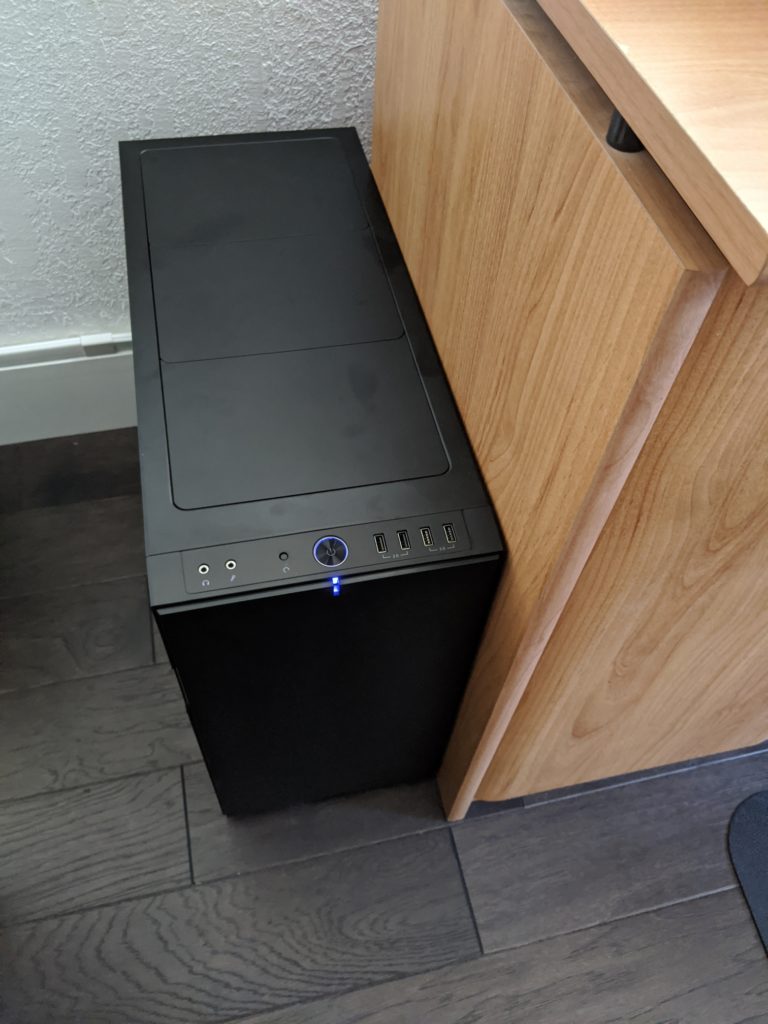
Case: Fractal Design Define R5 – Mid Tower ATX case
RAM: Corsair LPX 32GB (2x16GB) 3200MHz C16 DDR4 DRAM
GPU: EVGA GeForce GTX 1060 3GB
Motherboard: ASUS AM4 TUF Gaming X570
CPU: AMD Ryzen 5 3600 6-Core
Powersupply: Fractal Design Ion+ Platinum 860W PSU
SSD: Samsung 850 EVO 250GB
Hard Drives: 4 WD Blue 4TB 5400 RPM Hard Drives
Since I was repurposing the SSD and hard drives from my previous NAS, I didn’t buy those for this build. But here is the estimated cost of the NAS assuming those were included: $1,357.47 + tax.
(NOTE: Full disclosure, the links above are affiliate links to Amazon.)
A couple of notes on my hardware choices…
The case is amazing. It’s big, roomy, and extremely well-designed. It is also absolutely silent and does a great job with cable management. It also has plenty of room for hard drives, which I absolutely love. It’s also understated. I don’t need flashing lights with my NAS. I need a discrete box that makes no noise.

I had originally considered a different GPU, the PNY Quadro P2000. A lot of Plex forums suggested it was a real beast when it came to hardware transcoding for video. By the time I put this together, these were really hard to find and very expensive. I looked around and the GeForce GTX 1060 had higher benchmarks at a much lower price. You can see my testing data below to see how well it works and whether I made the right choice.
I also considered an AMD Threadripper over a standard Ryzen, but I also realized that I was passing the video transcoding to a GPU with this build (my last one used the CPU), which meant I really didn’t need that much CPU power. Again, you can see in the benchmarks below how well this paid off.
The remaining hardware choices were pretty straightforward. The SSD is small because it only houses the OS. All the storage is on the hard drives. I kept the ZFS raid (see details below) and can upgrade it by simply buying bigger hard drives in the future and swapping the smaller ones out, making this NAS fairly future proof for at least the next few years.
Software
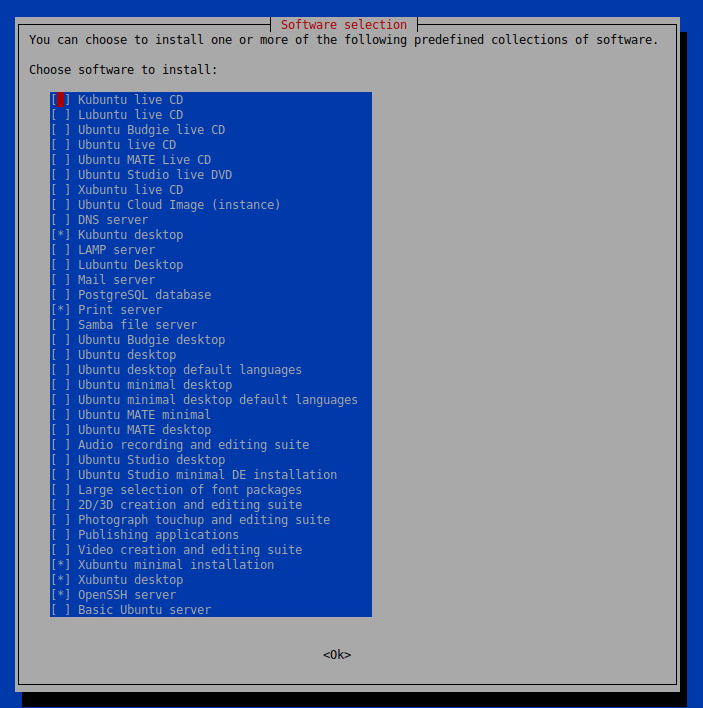
I changed very little from the previous NAS when it comes to software. I installed the latest Kubuntu LTS, 20.04. I am running the latest versions of Plex, Crashplan, tinyMediaManager, kTorrent, and nomachine. I am using NFS to access my server directly from other computers within the network. These are all detailed in my previous build.
I also kept my ZFS file system. Conveniently, I was able to transfer the raid right over to my new NAS, which I detail below.
Test Results
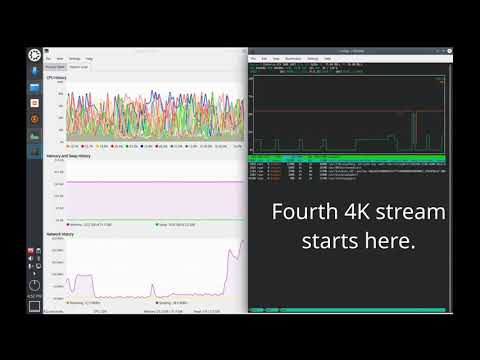
To test how well my new build did, I ran a couple of tests. First, I tried to simultaneously stream a 4K video to 5 devices – my TV, two Google Pixel 3 phones, a Google Pixel phone, and a laptop (all on my home network). The Google Pixel couldn’t handle the 4K video, so I ended up streaming a different 1080p video instead. My previous NAS couldn’t stream a single 4K video. This one handled all 5 streams like a champ, as shown in the video below:
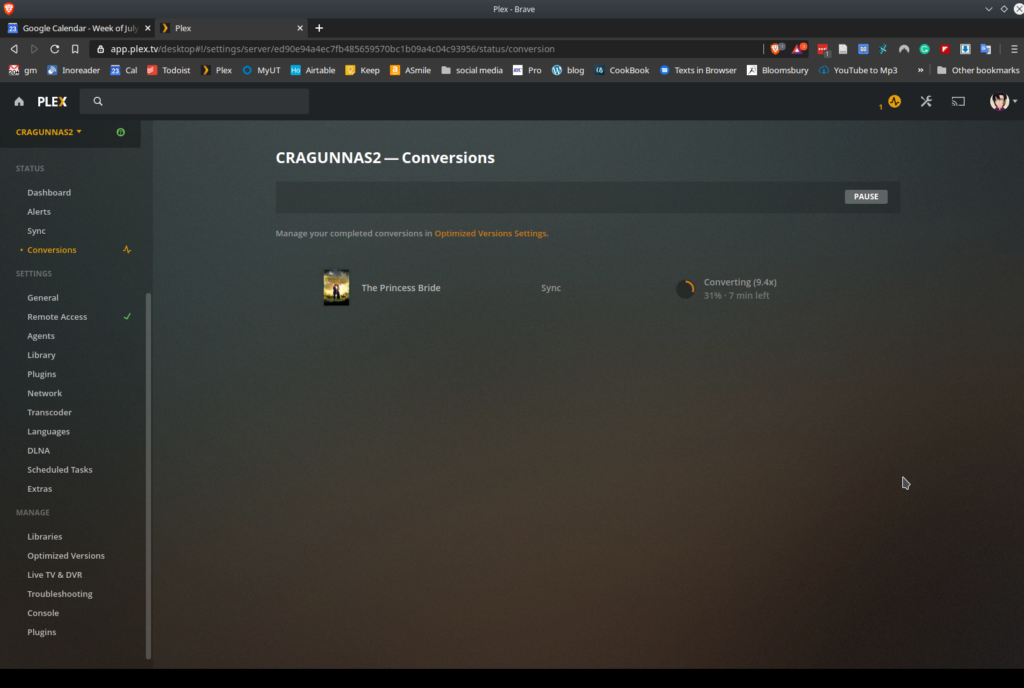
I also wanted to make sure that my Plex server was using the GPU for converting videos, so I took that same 4K video and set it to synchronize with my phone at 720p. On my previous NAS, converting a 31gb 4K video to a 720p video would have taken hours. Plex passed the conversion on to the GPU and it took less than 10 minutes.

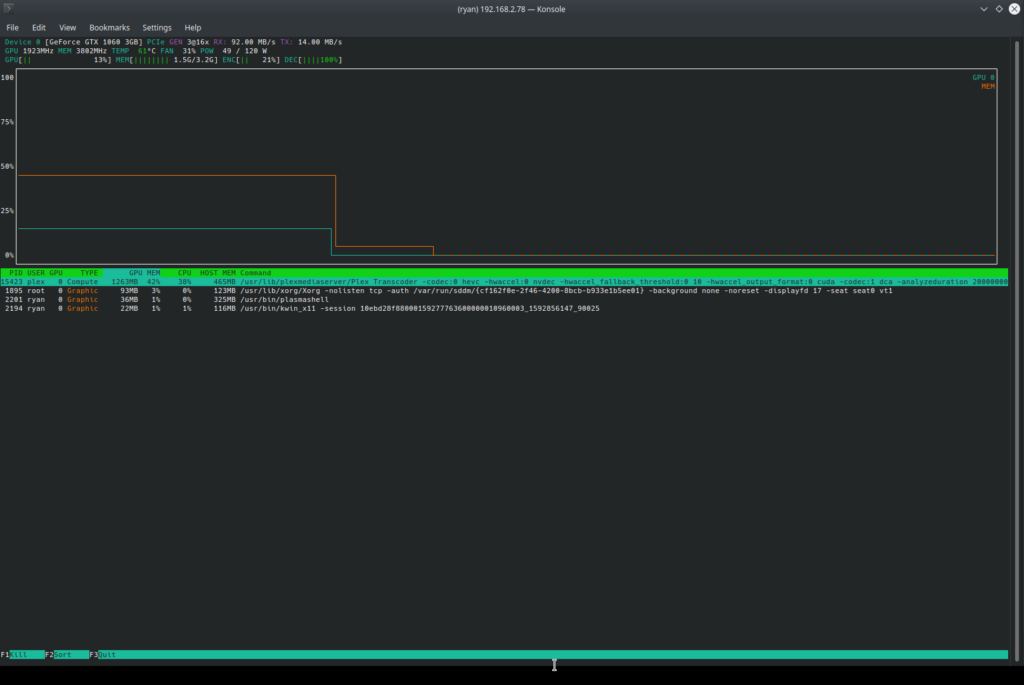

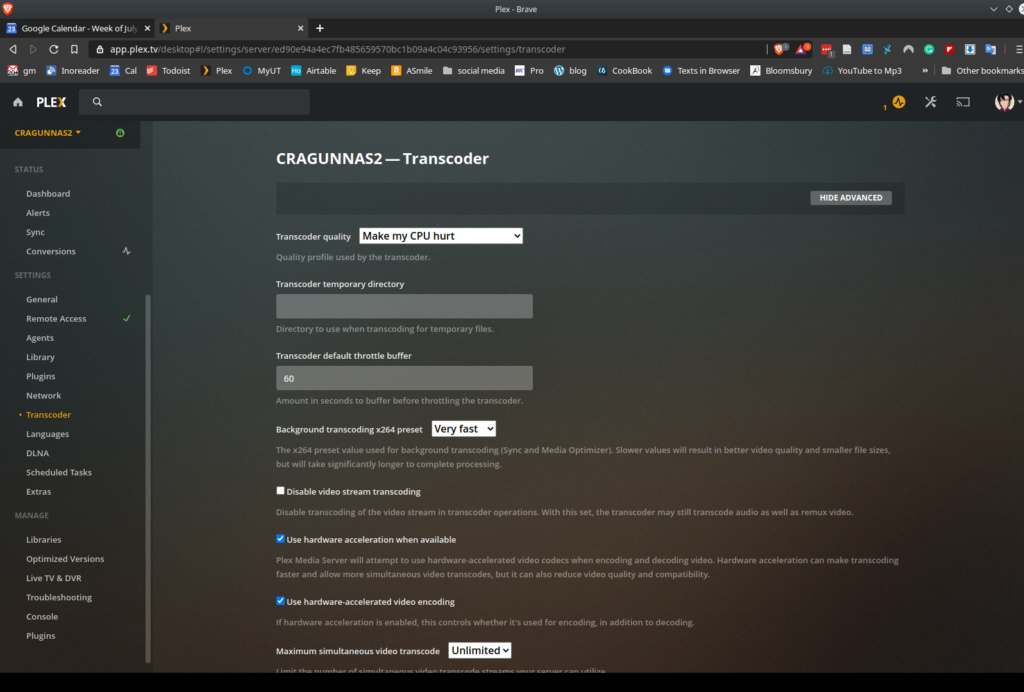
To make sure your Plex server is using your GPU, you need to set it to do so in the settings. It’s under Settings->Transcoder. Click on “Use hardware acceleration when available” and “Use hardware-accelerated video encoding.”

NOTE: To monitor the CPU, I used Ksysguard, which ships with Kubuntu. To monitor the GPU, I used “nvtop,” which can be installed from most distribution repositories.
Headless Monitor Issue
One of the problems I have been struggling with for months now (and had a similar issue with my previous NAS) was setting up a virtual screen/monitor. Here’s the problem…
I actually do the initial installation of the operating system using a monitor that I plug into the NAS. But I don’t want to keep a monitor out, sitting near my NAS/fileserver all the time. I want the NAS to be “headless” – meaning no monitor is attached. Once I get the operating system installed, I first install SSH (just in case I screw something up, ’cause you’re always going to screw something up). Then I install my remote management software, nomachine. Once I have nomachine installed, I can unplug the monitor, mouse, and keyboard and take care of everything else remotely. However, I found out with my previous NAS build, that the X server that manages sessions on Kubuntu, doesn’t set up a monitor if it doesn’t detect one being attached physically. In other words, if I restart the computer with no monitor attached, the X server correctly detects that there is no monitor attached and doesn’t set up a monitor in the X session.
As a result, when I would try to remotely connect to my NAS using a VNC client, the client would have to try to generate a monitor and the result was always problematic – either nothing would show up or it would be really slow and sluggish. I get that the X server doesn’t want to use resources to run a monitor if there isn’t a monitor connected. That’s a feature, not a bug. But it is a challenge to solve this problem. With my new NAS, it took me about 2 hours to finally figure out a solution. So I don’t have to go through this again, I’m going to post the solution here in detail.
With my previous NAS, I didn’t have a graphics card installed. I let the CPU do all the processing, which meant I needed a different solution than the one I had employed before (here’s the old solution). With my new NAS, I wanted a graphics card so I could pass off some of the video processing to the GPU instead. As noted above, I bought an NVIDIA graphics card, which Kubuntu recognized when I installed the OS and appropriately added the recommended NVIDIA drivers. My graphics card also runs the monitor. This was the key to solving my headless monitor issue.
Basically, what you need to do is tell the X Server to create a monitor even though one isn’t attached. You do this by creating a “xorg.conf” file that is stored in the /etc/X11/ directory. Once the NAS is up and running, you can actually let the NVIDIA X Server Settings application create the necessary xorg.conf file, for the most part. Here’s what you do. With the NVIDIA drivers installed and the NVIDIA X Server Settings application installed, launch the NVIDIA X Server Settings application. Go to the second option down on that window that reads, “X Server Display Configuration.”

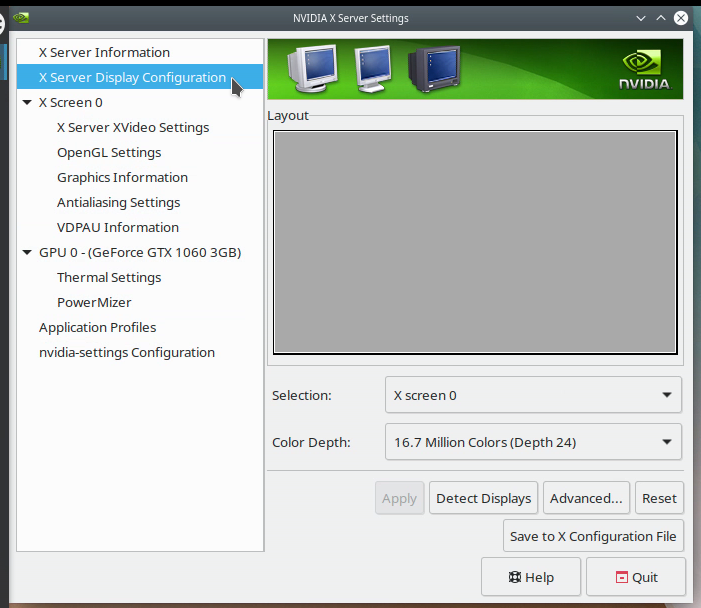
Near the bottom of that window is a button that reads, “Save to X Configuration File.” This is nearly the answer to all our problems.

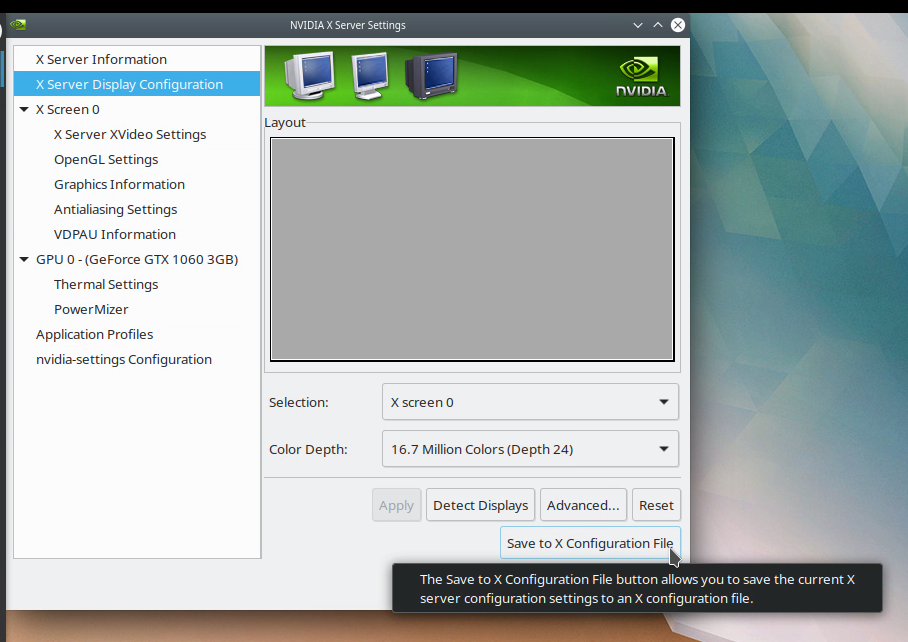
When you click on that, it will pop up a window that will allow you to preview the code it is going to add to /etc/X11/xorg.conf, which is the X server’s configuration file for the monitor. That code will be based on your current monitor – whatever is currently physically attached to the computer. Go ahead and follow the prompt and it will generate the xorg.conf file.
However, you now need to make two modifications to the file. I use “nano” to edit text files:
sudo nano /etc/X11/xorg.confFirst, you need to add the following to the Device Section of the xorg.conf file:
Option “AllowEmptyInitialConfiguration”This code tells the X Server that it’s okay to create a screen/monitor without a physical monitor connected. (Got this information from here).
Second, you need to add the dimensions of the virtual screen you want to set up to the “Display” SubSection of the “Screen” Section of the xorg.conf file, like this:
Virtual 1440 900This creates a virtual monitor/screen with the dimensions indicated. (Got this information from here). Here is the complete xorg.conf file I am using for my NAS:
# nvidia-settings: X configuration file generated by nvidia-settings
# nvidia-settings:  version 440.64

Section "ServerLayout"
    Identifier     "Layout0"
    Screen      0  "Screen0" 0 0
    InputDevice    "Keyboard0" "CoreKeyboard"
    InputDevice    "Mouse0" "CorePointer"
    Option         "Xinerama" "0"
EndSection

Section "Files"
EndSection

Section "Module"
    Load           "dbe"
    Load           "extmod"
    Load           "type1"
    Load           "freetype"
    Load           "glx"
EndSection

Section "InputDevice"
    # generated from default
    Identifier     "Mouse0"
    Driver         "mouse"
    Option         "Protocol" "auto"
    Option         "Device" "/dev/psaux"
    Option         "Emulate3Buttons" "no"
    Option         "ZAxisMapping" "4 5"
EndSection

Section "InputDevice"
    # generated from default
    Identifier     "Keyboard0"
    Driver         "kbd"
EndSection

Section "Monitor"
    # HorizSync source: edid, VertRefresh source: edid
    Identifier     "Monitor0"
    VendorName     "Unknown"
    ModelName      "Acer AL1917W"
    HorizSync       31.0 - 84.0
    VertRefresh     56.0 - 76.0
    Option         "DPMS"
EndSection

Section "Device"
    Identifier     "Device0"
    Driver         "nvidia"
    VendorName     "NVIDIA Corporation"
    BoardName      "GeForce GTX 1060 3GB"
    Option	   "AllowEmptyInitialConfiguration"
EndSection

Section "Screen"
    Identifier     "Screen0"
    Device         "Device0"
    Monitor        "Monitor0"
    DefaultDepth    24
    Option         "Stereo" "0"
    Option         "nvidiaXineramaInfoOrder" "DFP-0"
    Option         "metamodes" "nvidia-auto-select +0+0"
    Option         "SLI" "Off"
    Option         "MultiGPU" "Off"
    Option         "BaseMosaic" "off"
    SubSection     "Display"
        Depth       24
	Virtual 1680 1050
    EndSubSection
EndSection
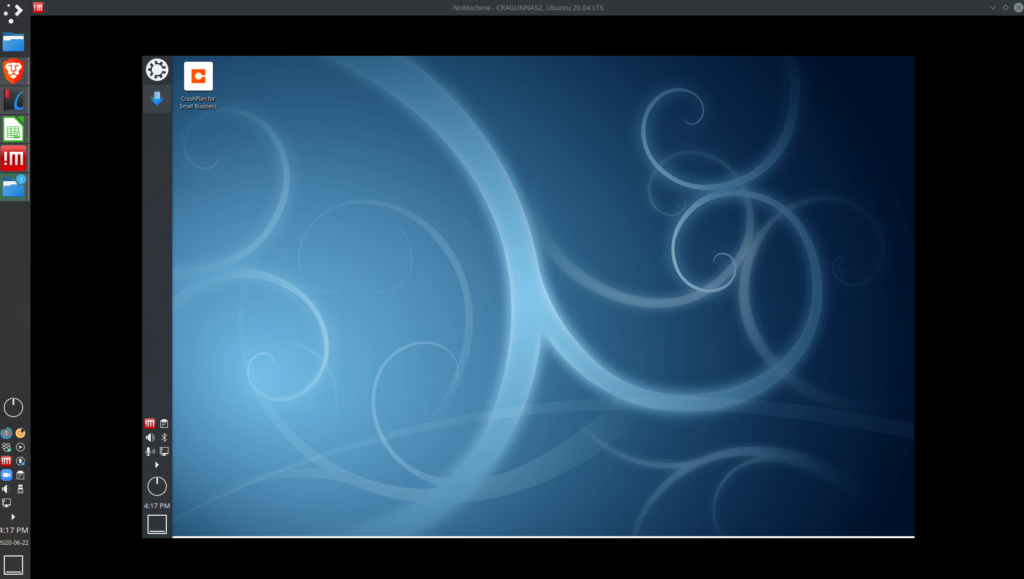
With the above xorg.conf file (which is located in /etc/X11/, so, /etc/X11/xorg.conf), I can then shutdown my NAS, unplug the mouse, keyboard, and monitor, then restart it and use nomachine to completely control the NAS. Here’s how it looks when I pull it up:

This approach will only work if you have an NVIDIA graphics card. If you don’t, you’ll need to take a different approach. This site may point you in the right direction.
UPDATE 2020-07-13: Back to XFCE
Well, I’m back to using XFCE as my desktop environment on my NAS/file server. An update completely wiped out KDE making it throw errors every time I tried to reboot the file server and not even showing the desktop. KDE is just not the right option for a NAS/file server. I had the same issue with my previous file server. Lesson learned. From now on, ultra lightweight XFCE will be my desktop environment of choice from my file server.
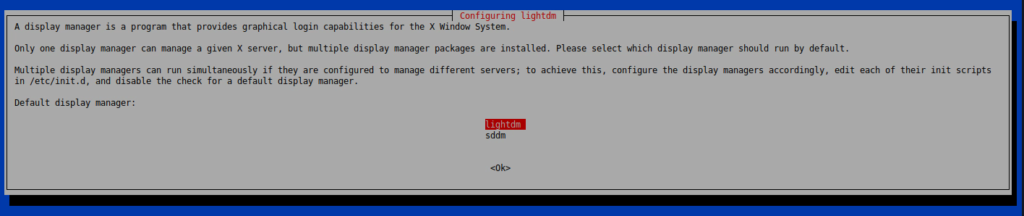
How to install XFCE. First, install tasksel:
sudo apt-get install taskselThen run tasksel and select Xubuntu desktop:
sudo tasksel
When prompted, select “lightdm” as your display manager of choice:

Go ahead and restart and you’ll be good to go. (NOTE: I’m still using the same xorg.conf file and it’s working.)
Also, I had to manually remove the NVIDIA drivers then reinstall them with the monitor connected.
ZFS Transfer
As I detailed in my previous NAS build, I opted to go with ZFS for storing my files using a raidz2 array (4 x 4tb drives). It provides, IMO, the optimal balance of speed and redundancy. With just over 4tb of files on my ZFS array in my old NAS, I didn’t really want to have to copy all of those files over to the new. As it turns out, ZFS has the ability to move physical disks to a new device and recreate a ZFS pool. Hallelujah!
On the old NAS, I shut down all connections to my NAS from external devices, restarted the machine, and then used the following command:
sudo zpool exportThis basically sets up the ZFS pool so it is ready to be transferred to another machine. I then physically removed all four 4tb drives from the old NAS, moved them to the new one, and got everything ready to import the new NAS. I installed the following packages first:
sudo apt-get install zfsutils-linux nfs-kernel-server zfs-initramfs watchdogThe above packages also installed the following packages:
libnvpair1linux libuutil1linux libzfs2linux libzpool2linux zfs-zed keyutils libnfsidmap2 libtirpc-common libtirpc3 nfs-common rpcbindWith those installed, I checked to see if I had any pools (I didn’t, of course, I hadn’t set any up):
zpool statusThen, I used the following command to look for the pool that was spread across the four hard drives:
sudo zpool importBeautifully, it immediately found the pool (ZFSNAS) and gave me a bunch of useful information:
pool: ZFSNAS
id: 11715369608980340525
state: ONLINE
status: The pool was last accessed by another system.
action: The pool can be imported using its name or numeric identifier and the '-f' flag.
see: http://zfsonlinux.org/msg/ZFS-8000-EY
config:
 ZFSNAS      ONLINE
      raidz2-0  ONLINE
        sdd     ONLINE
        sdb     ONLINE
        sde     ONLINE
        sdc     ONLINE
Honestly, I cheered when I saw this. It was going to work. I then used the following command to import my pool:
sudo zpool import -f ZFSNASThen, just to be sure everything worked, I checked my pool status:
zpool statusAnd up popped my zpool. It did tell me that I needed to upgrade my pool, which I proceeded to do. And, with that, my pool from my old NAS was transferred to my new NAS intact. No need to copy over the files. ZFS is definitely the way to go when it comes to NAS file storage. I’m increasingly happy with ZFS!
NOTE: I bought a 10gb external drive and copied everything onto it just to be extra cautious. Turns out, I didn’t need to do that. But, better safe than sorry.
Mounting Fileserver Across the Internet
This trick blew my mind. I am using EasyDNS to be able to VNC into my fileserver from wherever I am in the world (since I don’t have a static IP from my ISP). Nomachine works like a champ across the internet. But I had a crazy thought the other day, “Wouldn’t it be nice if I could actually mount my fileserver directly onto my work computer?” I don’t typically need to do this but I have been working with some files on my fileserver for a project and wanted direct access. Turns out, you can (thank you StackExchange). And so easily it will blow your mind. Linux rocks!
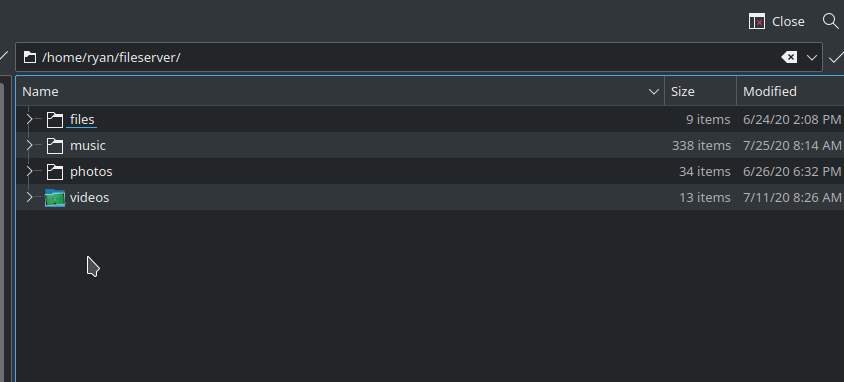
Since I have already set up SSH access on my fileserver, all I needed to do was learn about this as I already had all the packages installed. (If you haven’t set up SSH on your fileserver and opened the relevant ports on your home network, do that first). Then, on my computer at work, I created a new folder in my home directory (/home/ryan/fileserver/). I then used the following command at the terminal to mount my fileshares on my work desktop:
sshfs ryan@myfileserver.easydns.org:/directory/to/share /home/ryan/fileserverYou obviously need to change your username for your fileserver, which comes before the “@”, and need to have the IP address of your fileserver (what comes after the “@” sign). You also need to know what directory from your fileserver you want to mount (comes after the :/) and the folder where you want to mount it (the last piece). Once you have everything set up correctly, hit enter and it will ask you for your password. Once I entered my password, all of the files on my fileserver were securely shared over SSH to my work desktop:

Note, this isn’t a permanent share. Once you shutdown your work computer, the share will go away. But it’s just a quick repeat of that command and you’ll have the files mounted right back to your computer. Also, the speed with which you can access the files will depend on your home and work networks. Luckily, mine are both very fast. So, it’s basically like being on my home network as I work with the files I need. Absolutely amazing!
![]()
