

I mostly buy digital audio these days. My preferred source is bandcamp as they provide files in FLAC (Free Lossless Audio Codec). However, I ended up buying a CD recently (Last Night’s Fun by Scartaglen) as there wasn’t a digital download available and, in the process, I realized that there are lots of options for ripping the audio from a CD on Linux and quite the process to get the files ripped, tagged, properly named, and stored in my library. This is my attempt to summarize my process.
Format/Codec
First, you need to decide in what format you want the audio from the CD. As noted, I prefer FLAC these days. Given how relatively inexpensive storage is, I no longer need to scrimp on space for the most part. If space was an issue, ripping the files to mp3 format at, say, 192 kbps at a variable bit rate would probably be the optimum balance between decent quality and small size. But I prefer the best quality sound with no real regard for the size of the resulting files. It helps that I store all my music on a dedicated file server that runs Plex. That solves two problems: I have lots of space and Plex will transcode the files if I ever need that done (if, for example, I want to store the music on my phone and want it in a different format). So, my preferred file format is FLAC. (Another option is OGG, but I find not as many audio players work as well with OGG.)
There is another issue that I recently ran into: single audio files with cue sheets. Typically, people want their audio in individual files for each song. However, if you want to accurately represent an audio CD, the best approach to do this is to rip the audio as a single file with a corresponding cue sheet. The cue sheet keeps an exact record of the tracks from the CD. With the resulting two files, the audio CD can be recreated and burned back to a CD. I have no real intention of burning the audio back to a CD (I want everything digital so I can store it on my file server), but it’s good to know about this option. Typically, those who opt for this approach use one of two formats, .flac or .ape, for storing the audio and .cue for storing the timing of the tracks. The .ape format is a proprietary format, however, so it is definitely not my preferred approach.
As a quick illustration for how file format is related to size, I ripped my demonstration CD, Last Night’s Fun by Scartaglen into a single FLAC file and a single mp3 file (at 192 kbps using a variable bit rate) and put the resulting files into the same folder so you can see the size difference:

As you can see, the FLAC rip resulted in a file that was 222.9 MB compared to the mp3 file that is only 49.4 MB. The FLAC file is about 4.5 times the size of the mp3 file. A higher-quality mp3 rip at 320 kbps at a constant bit rate resulted in a 54.8 MB file. A pretty good estimate would be that the FLAC format is going to be somewhere between 3 to 5 times the size of an mp3 file. Thus, if space is an issue but you want good quality, ripping your music to the highest quality mp3 (320 kbps) is probably your best option. If space isn’t an issue and you care more about quality, FLAC is the way to go.
NOTE: I also ripped the disc to OGG and the file size was 38 MB.
Ripping Software
First, if you’re planning on ripping to FLAC on Linux, you’ll need to install FLAC. It is not installed in most distributions by default. This can be done easily from the terminal:
sudo apt-get install flacWithout FLAC installed, the software below won’t be able to rip to FLAC.
K3b
K3b is installed in Kubuntu 20.04 by default and is, IMO, a good interface for working with CDs and DVDs. When I inserted my demonstration CD into my drive, Kubuntu gave me the option of opening the disk in K3b. When I did, K3b automatically recognized the CD, grabbed the information from a CDDB, and immediately gave me options for ripping the CD:
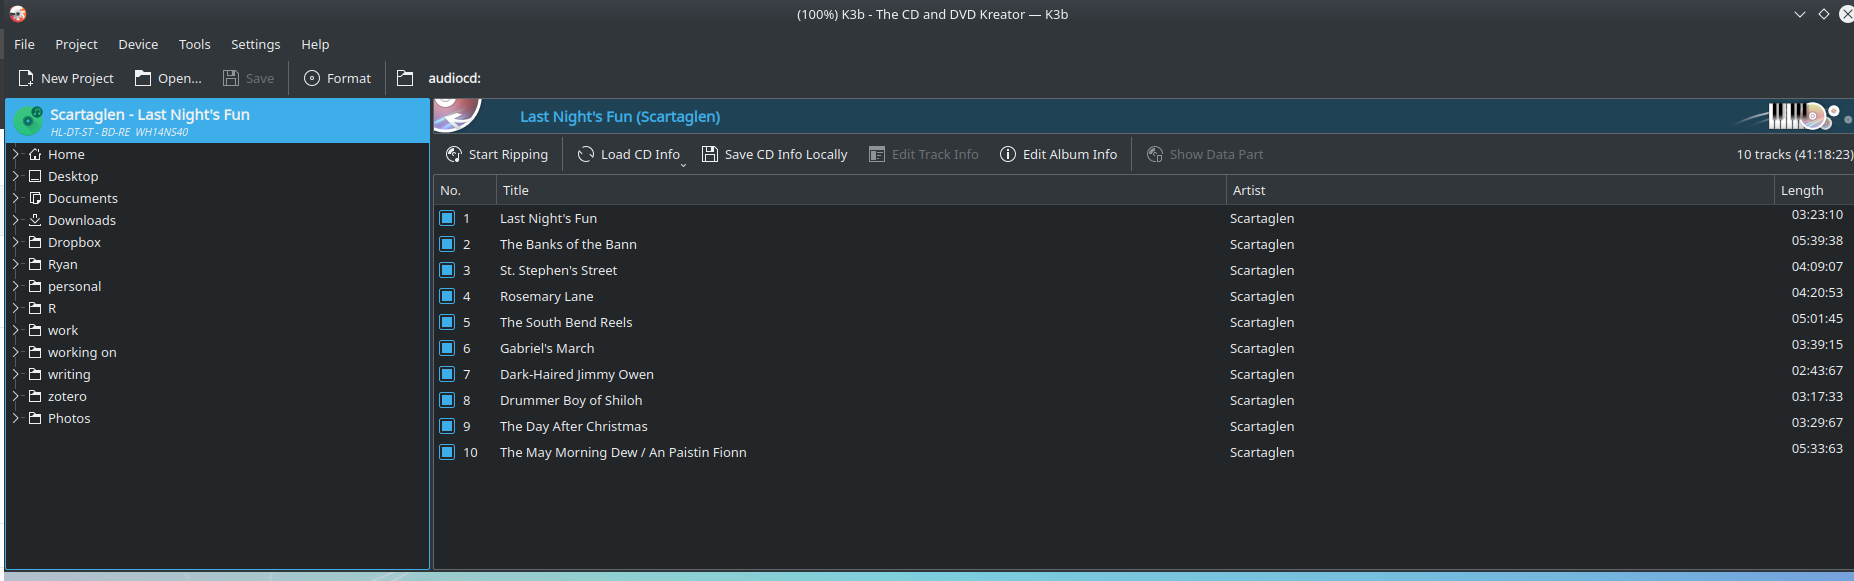
When you click on “Start Ripping,” you get a new window:
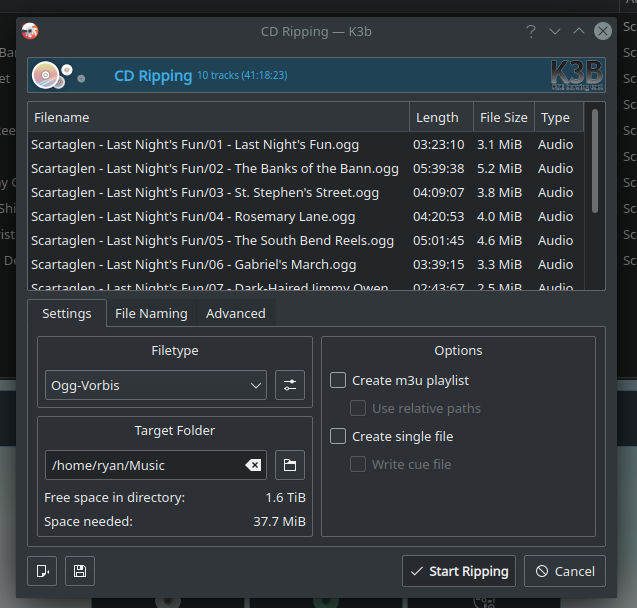
In this new window, you have a bunch of options. You can change the format (Filetype). With the FLAC codec installed, the options listed are: WAVE, Ogg-Vorbis, MPEG1 Layer III (mp3), Mp3 (LAME), or Flac. You can obviously change the Target Folder as well. K3b also gives you the option of creating an m3u playlist and the option “Create single file” with “Write cue file” which is where you could create the single file and cue file from the CD as noted above. There are also options for changing the naming structure and, under the Advanced tab, options for how many times you want to retry reading the CD tracks. K3b is pretty fully featured and works for well for ripping audio CDs.
Clementine
My preferred music player in Linux is Clementine. I have used a number of music players over the years (e.g., Banshee, Rhythmbox, Amarok), but Clementine has the best combination of features while still being easy to use. Clementine is in the repositories and can easily be installed via synaptic or the terminal:
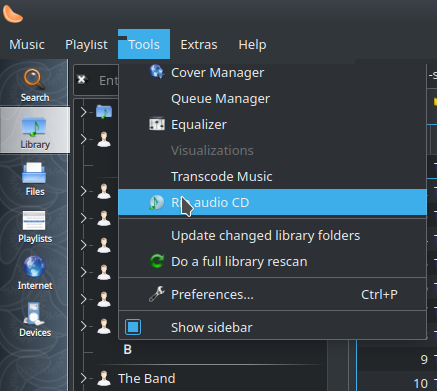
sudo apt-get install clementineClementine also has the ability to rip audio CDs. Once your CD is inserted, click on Tools -> Rip audio CD:
You’ll get this window, which is similar to the ripping window in K3b:
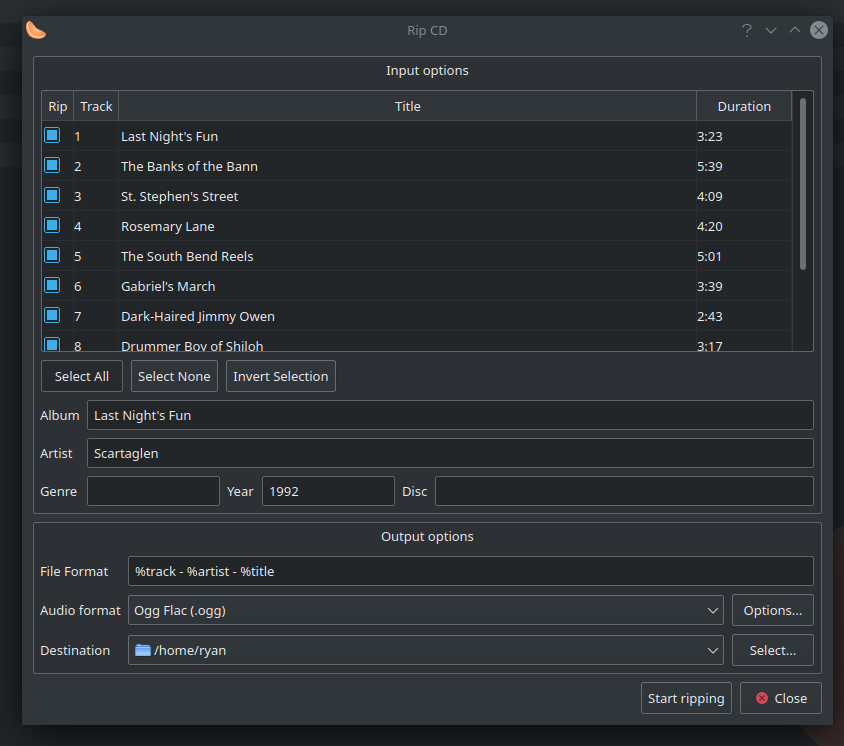
If the information is available in a CDDB, Clementine will pull that information in (as it did for my demonstration CD). You then have a bunch of options for the Audio format: FLAC, M4A, MP3, Ogg Flac, Ogg Opus, Ogg Speex, Ogg Vorbis, Wav, and Windows Media Audio. The settings for each of these can be adjusted in the “Options” box. One clear advantage of Clementine over K3b is that you can readily edit the titles of the tracks. Another advantage of Clementine over K3b is that you could import the files directly into your music library.
Ripping from a Cue Sheet
Another scenario I have run into on Linux is having a single file for the audio from a CD with a corresponding .cue sheet (the file is typically in the FLAC format, but I have also run into this in .ape format). I used to immediately turn to Flacon, a GUI that helped rip the single file into individual tracks. However, I have had mixed success with Flacon working lately (as of Kubuntu 20.04, I couldn’t get it to work). Never fear, of course, because Flacon is really just a GUI for tools that can be used in the terminal.
To split a single FLAC file with a corresponding .cue sheet into the individual tracks, you’ll need to install “shntool“:
sudo apt-get install shntool(NOTE: It’s also a good idea to install the suggested packages, “cuetools,” “sox,” and “wavpack” but not required.) Assuming you have already installed “flac” as described above, ripping a single FLAC file into the individual tracks is fairly straightforward. The easiest way is to navigate to the folder where you have the FLAC file (e.g., “audiofile.flac”) and the cue sheet (e.g., “audiofile.cue”). Then use the following command at the terminal:
shnsplit -f audiofile.cue -o flac audiofile.flac Breaking the command down, “shnsplit” calls the program “shnsplit” which is part of the “shntool” package. The “-f” tells the program to show detailed format information. The first file is the cue sheet. The “-o” indicates that you are going to specify the output file format extension. After the “-o” is the target file format “flac” and the last file is the single FLAC file that you want to split.
Here’s a screenshot of me rippling the single FLAC file from my demonstration CD into individual FLAC files:
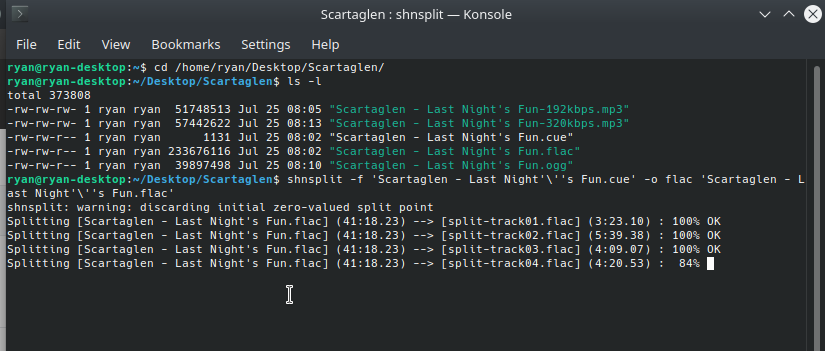
If you happen to run into a single audio file in the .ape format, shntool probably won’t be able to read it so the above command won’t work. However, a simple workaround is to convert the file to flac format using ffmpeg, which can read it. Here’s the command you could use from the terminal:
ffmpeg -i audiofile.ape audiofile.flacThat command will call ffmpeg (which you probably have installed) and convert the .ape file into a .flac file which can then be split using the command above (assuming you have a corresponding cue sheet).
Tagging Software
Let’s say I have successfully ripped my files into my desired format and now I want to tag them. There are a number of software packages that can do this, but my preferred software is Picard by MusicBrainz. Picard is open source, which is awesome, but it also interfaces with the MusicBrainz website and pulls in information that way, which means your files will get robust tagging information. If you pull in all the information from MusicBrainz, not only will the artist and album be tagged, but so to will lots of additional information, depending on how much was entered into the database by whoever added the album in the first place. (NOTE: Clementine also interfaced with MusicBrainz but this broke in 3.1. Once it broke, I started using Picard directly and now I realized that it has a lot more features than Clementine’s implementation, so I just use Picard. However, you could try doing this in Clementine as well.)
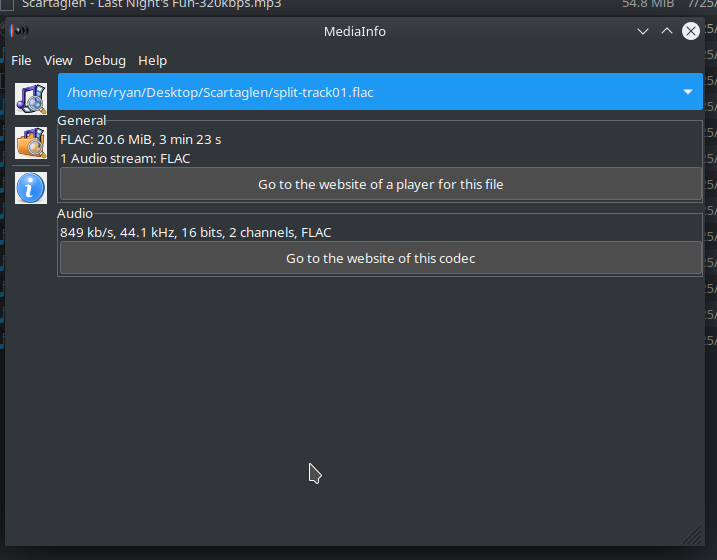
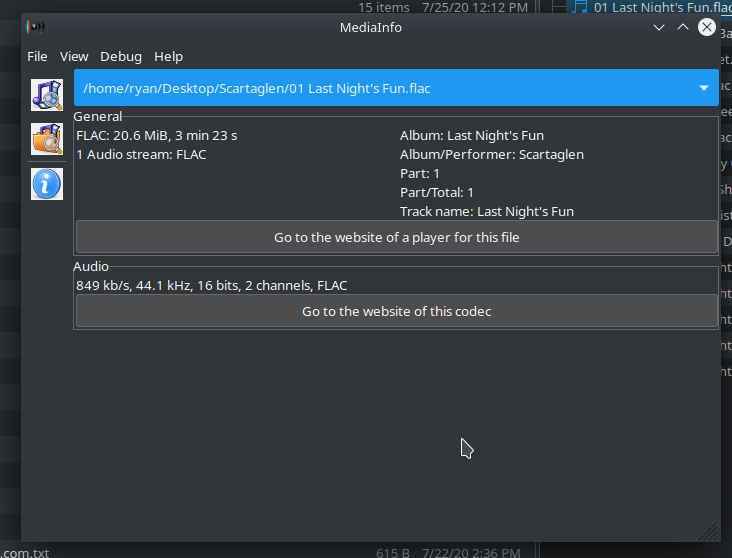
Again, I’ll use my demonstration CD to illustrate how this is done. I ripped the tracks into individual FLAC files above. Those tracks are completely devoid of tags – whatever software I use to try to play them won’t know what the audio files are. The screenshot below illustrates this. I used MediaInfo (a gui for pulling information from audio and video files in Linux) to pull available information from the file. It shows the format and length but provides no information about the artist or album, which it would if the file had tags.
We’ll use Picard to find the album and add all the tags. First, of course, install Picard:
sudo apt-get install picardOpen the program. Now, since my files have no tag information, I’m going to click on Add Files (you can also add a folder with subfolders, which then has Picard run through multiple audio files, a great feature if you are tagging multiple albums at the same time).
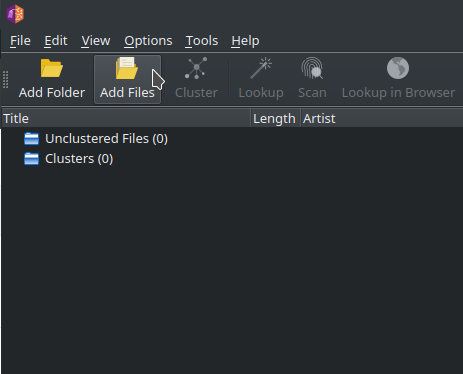
You’ll get a new window where you can select the audio files you want to add. Select them and then click “Open.”
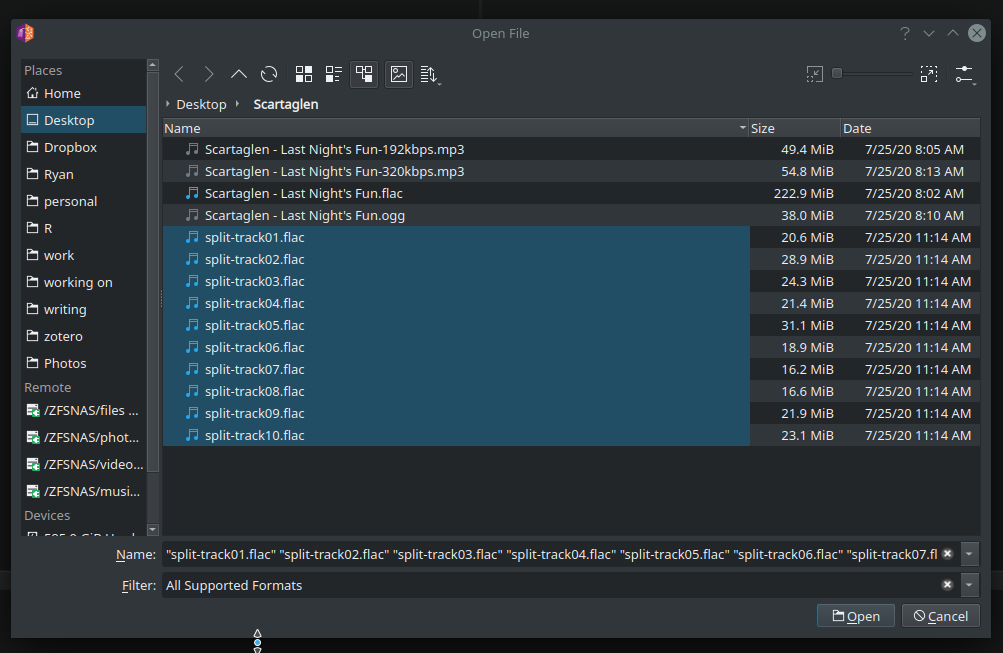
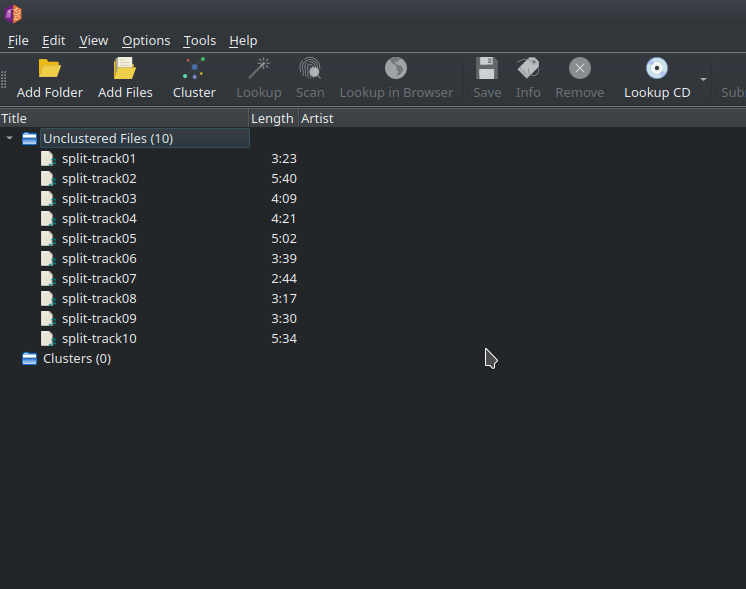
If the files have existing tags, Picard will do its best to group the tracks together and may even associate the files with the corresponding albums. In my case, it simply puts the files into the “Unclustered” category:
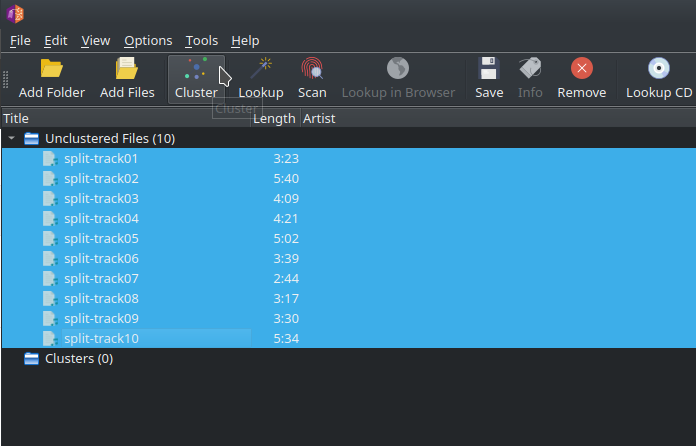
Since I pulled them all in from the same folder, I can select the tracks and then click on the “Cluster” button in the toolbar and Picard will cluster the files.
Clustering is a first step toward find the corresponding album information. Once they are grouped together, they will show up in the Cluster category:
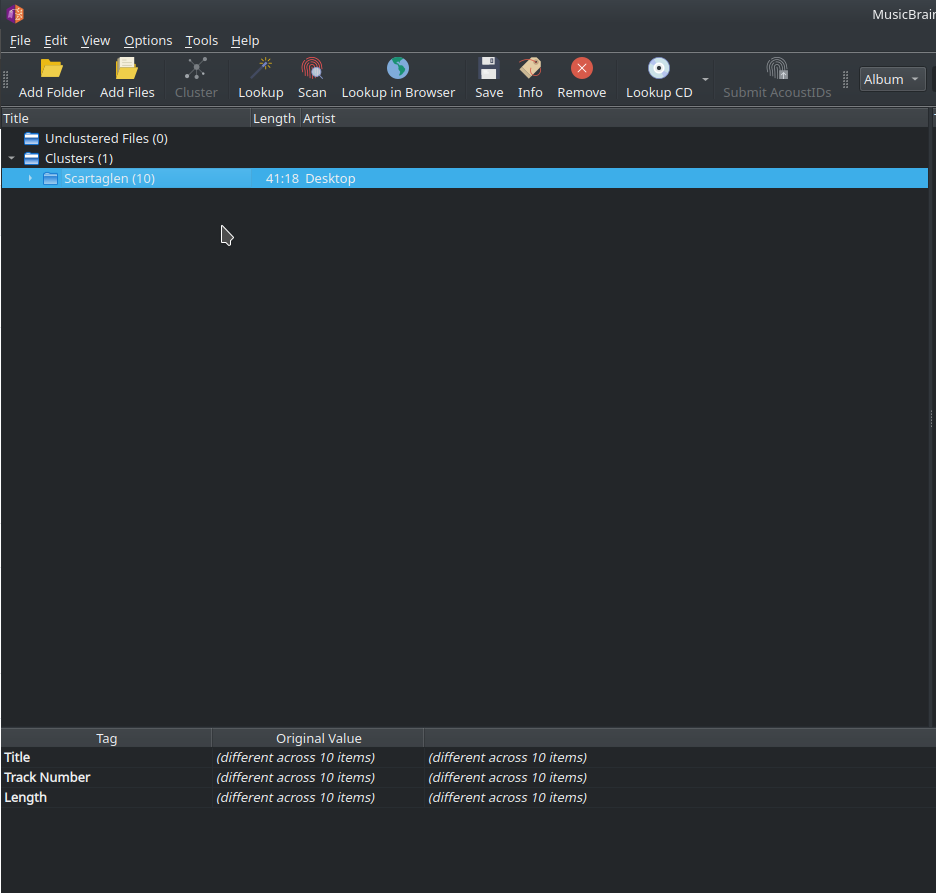
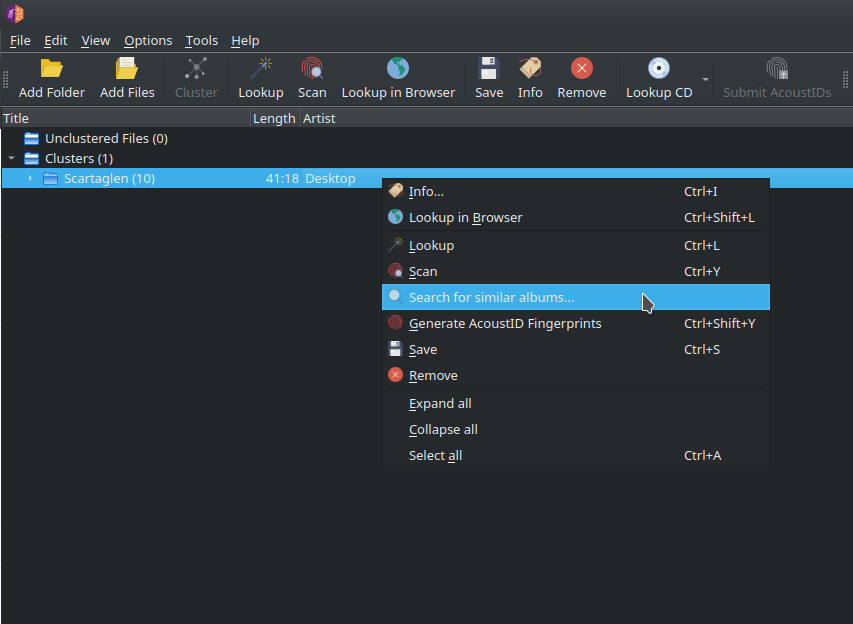
Without any tag information, Picard is unlikely to find the corresponding album if you select the cluster and then click on “Lookup.” If there was some tag information in the files, that might be enough for Picard to find the corresponding albums, so you could just select the album and then click on “Lookup.” In this case, that won’t work. So, I’m going to use a different approach. If you right-click on the cluster, you can select “Search for similar albums.”
This gives you a window where you can enter search terms to try to find the corresponding album in the Music Brainz database. Based on the limited information it has, it will try to find a corresponding album automatically. But it likely won’t find it because there are no tags, so there is virtually no information available. Generally, I have found that I have better luck finding albums if I use the album title first followed by the artist, like this “Last Night’s Fun Scartaglen” then hit enter:
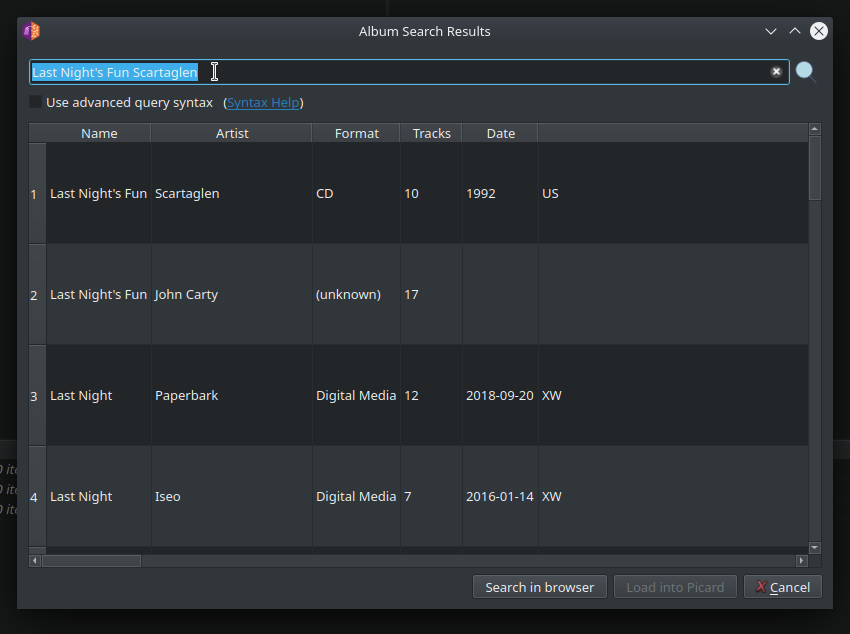
Once you find the correct album, select it and then click on “Load into Picard” at the bottom of the window.
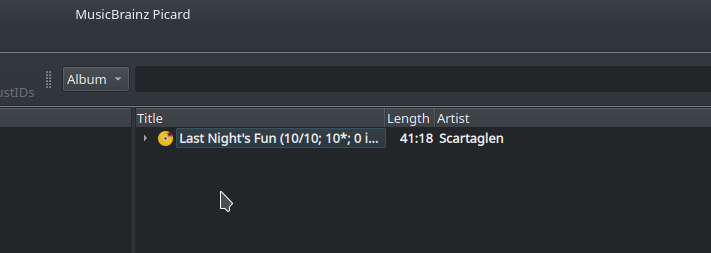
Once you do that, the album will move to the right side of the screen. If all of the tracks are included and Picard is able to align them with the corresponding information it has from the database, the CD icon will turn gold. If there is a little red dot on the CD, that means Picard has tag information that can be saved to the individual tracks.
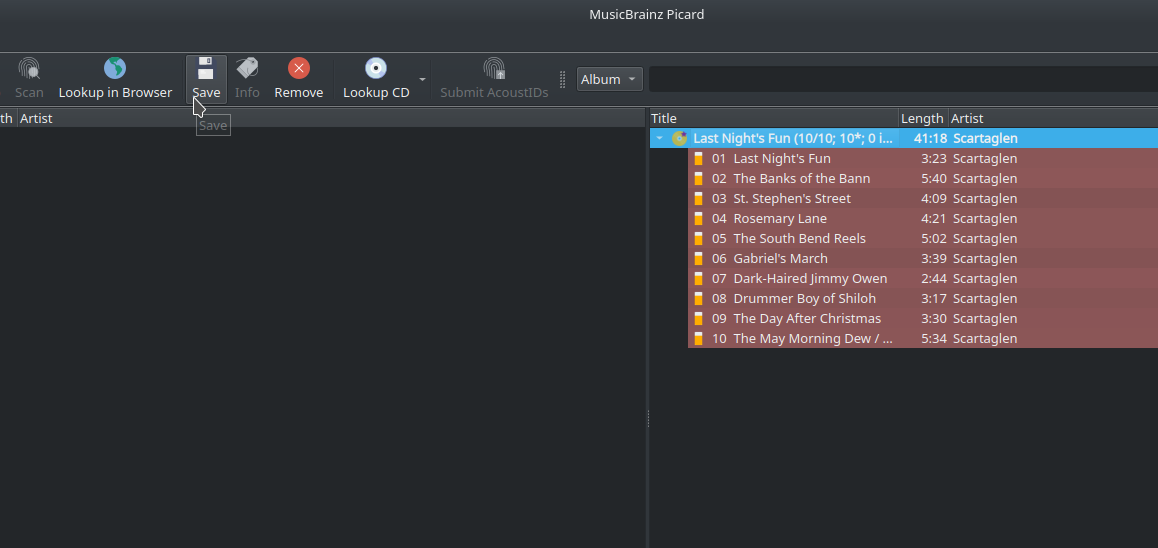
Click on the album and then click the “Save” button in the toolbar and the tag information will be saved to the files.
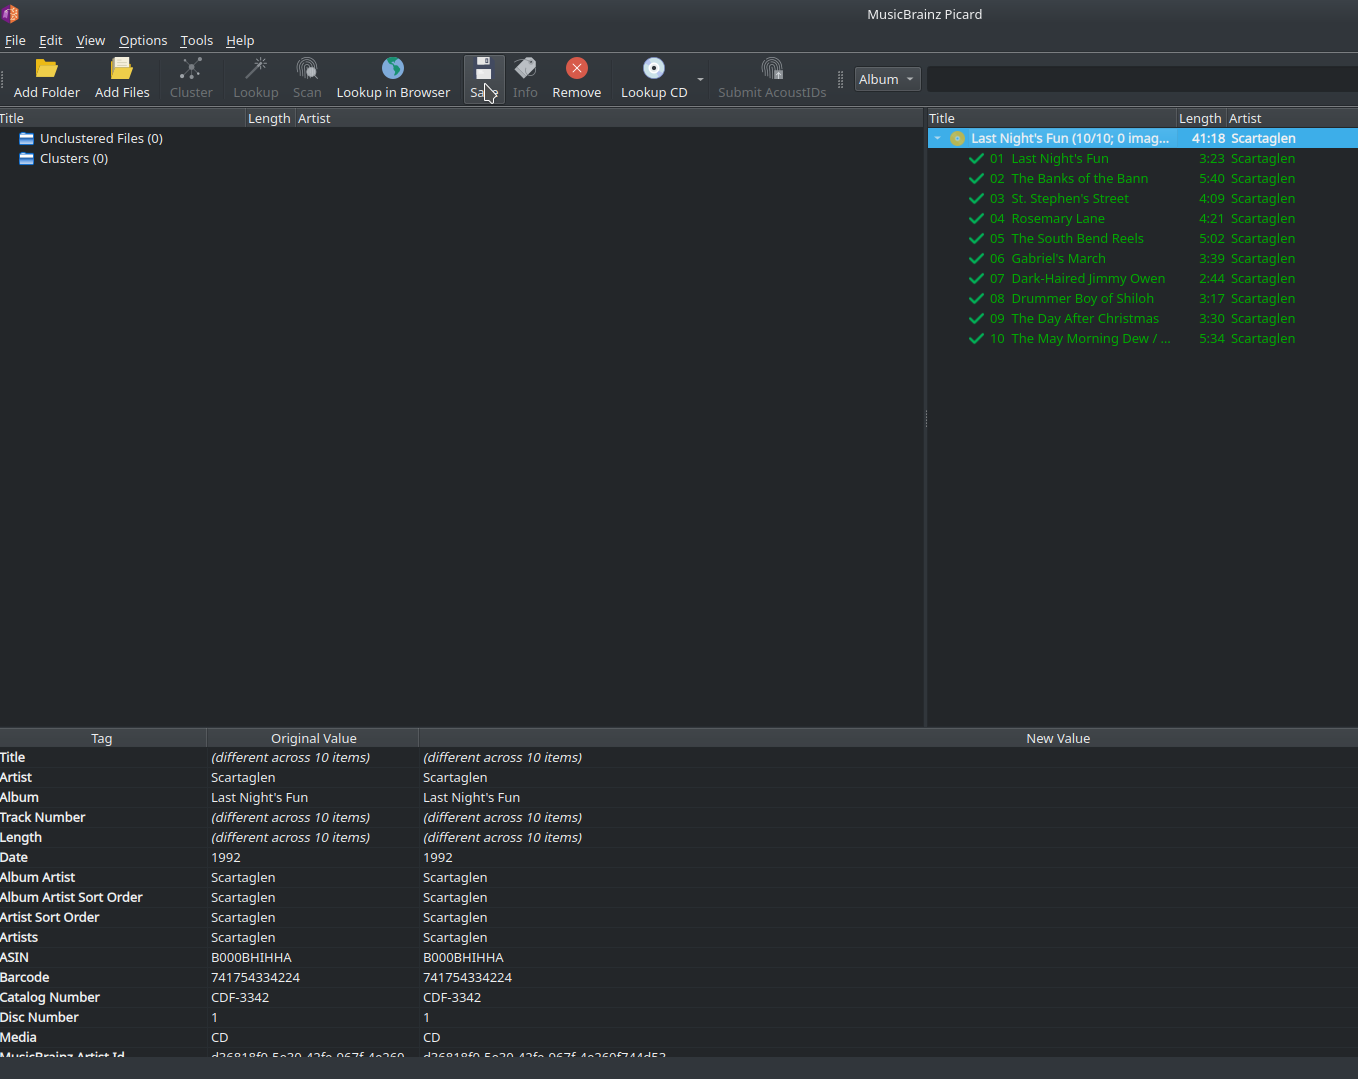
You can track the progress as tracks will turn green once the information has been successfully added to the tags.
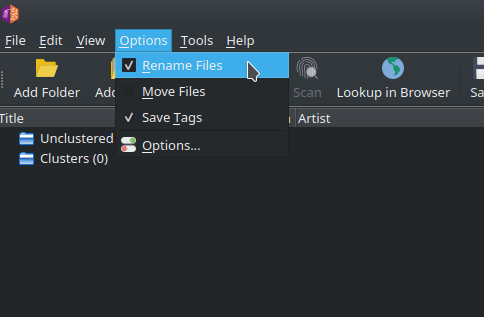
You can also set up Picard to modify the file names when it saves information to the files. Click on “Options” then click the checkmark next to “Rename Files.”
I typically let Clementine rename my files when I import them into my Music library, so I don’t worry about this with Picard, but it is a nice option. Finally, here’s that same Mediainfo box with the tagged file showing that information about the artist and track is now included in the file:
![]()
