I spent the last year or so cleaning up my music library. It is now organized how I want it to be. I use two software packages to play my music. At home, on my primary computer, I use Clementine (which is also partly how I organized my library). When I’m away from home, I use Plex. With my music library cleaned up, I have started building a few playlists. Many of my playlists are automated; this tutorial doesn’t apply to those. I have started building just a handful of playlists that are very specific. I was building the playlists in both Clementine and Plex and realized that, if I built the playlist in one of the programs, I’d likely want to have the playlist in the other program as well. The problem I was running into is that there is no native way to import or export playlists to Plex.
This sent me down a weird, tangled path. Let me see if I can summarize the situation briefly. Before September 2018, there were some plugins that allowed some playlist import/export functionality. (NOTE: Until writing this post, I didn’t even know there were Plex plugins.) In September of 2018, the Plex developers announced they were discontinuing plugins. That announcement obviously wasn’t that popular with the Plex users who relied on the plugins. Since then, many of the plugins that previously worked have been discontinued and are no longer updated.
Some programmers have switched from developing plugins to developing stand-alone applications that now interface with the Plex Media Server. These applications are no longer installed in the now-defunct “plugins” directory of Plex. One of these applications, WebTools-NG, has a feature that helps partially solve the playlist import/export problem.
(ASIDE: If you google for exporting playlists from Plex, you’ll likely find a few posts or pages from before 2018 indicating that you could click on the context menu inside a playlist in Plex and find an export option. As of the latest version of Plex – I’m currently running 1.22.3.4392 – that option does not exist. So, don’t bother looking for it.)
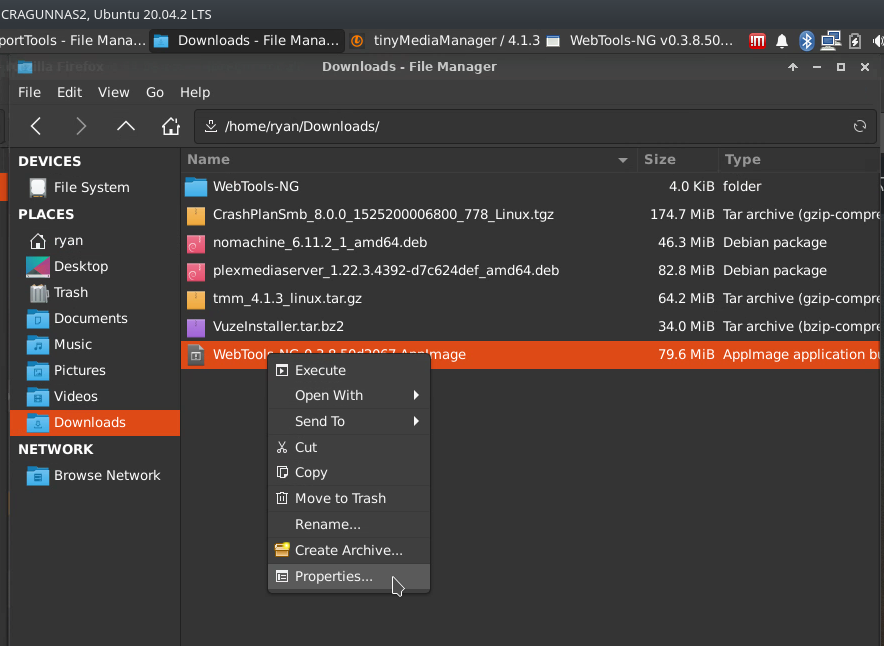
As I’m on Linux, the WebTools-NG application is an AppImage – nothing to install, just run the AppImage. Download it and put it somewhere where you will remember. You’ll also want to right-click on it and select “Properties.”

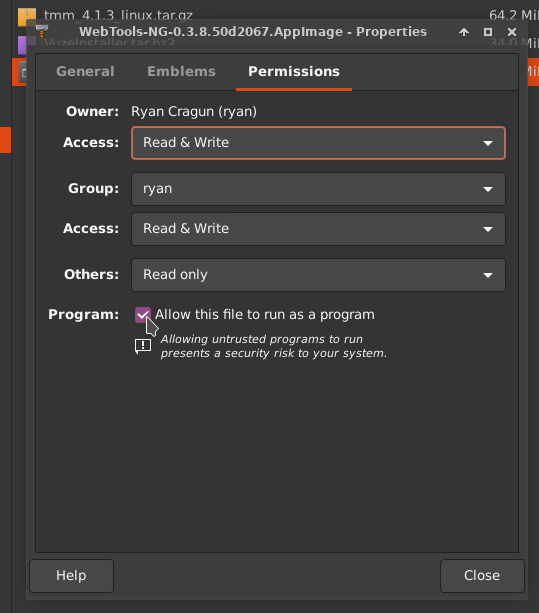
In permissions, select “Allow this file to run as a program.”

Once you’ve done that, double-click the application and you’ll get a log in screen that requires your Plex credentials. Fill those out and log in. Assuming everything works, you’ll get a screen like this:


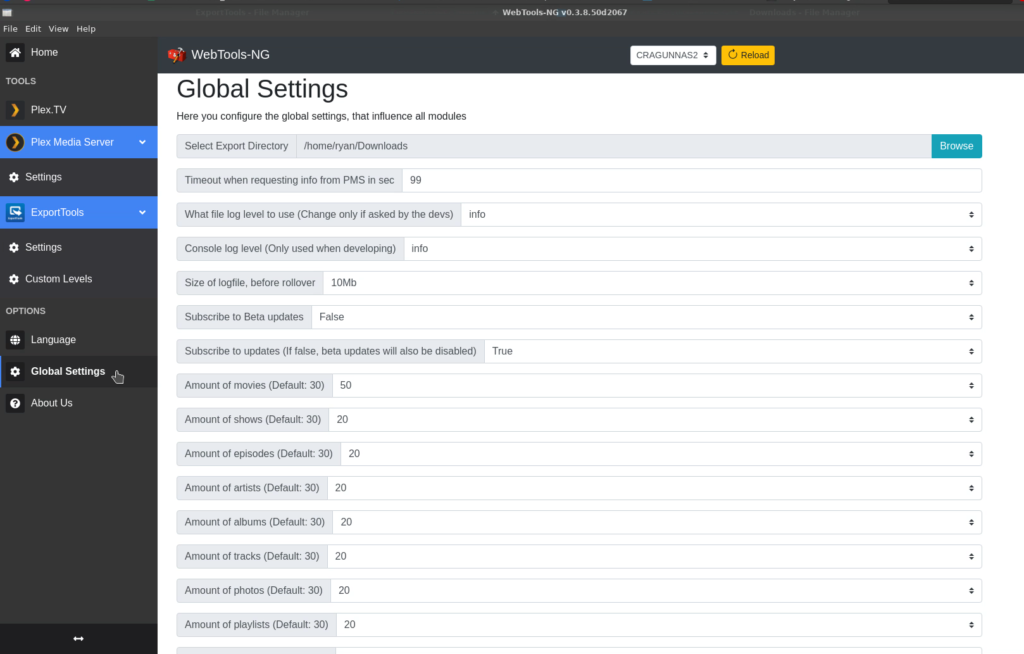
A couple of things to do before you start messing with the playlists. At the top, select your Plex server. You can see I have selected mine:


If you’re like me, you’re probably wondering why you’d need to select your server. It took me a second to realize that some people have multiple servers. That feature exists so people who have multiple servers can select the one they want to work with. Now, go to Global Settings and change two options. First, set your Export Directory and change the “Timeout when requesting info from PMS in sec” to 99. Without changing that, the application was timing out with some of my requests.

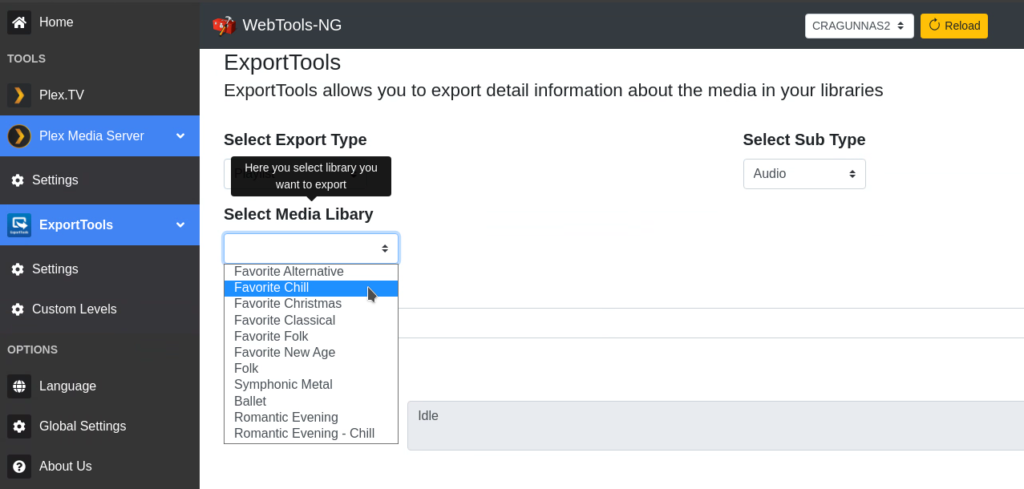
Now, to work with the playlists… click on ExportTools on the left and you’ll get this window:

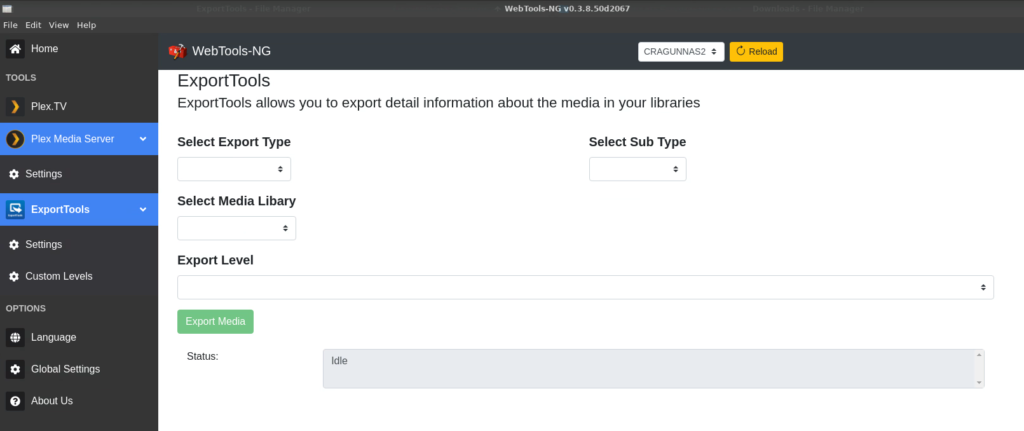
Since I’m working with an audio playlist, in the Select Export Type, I selected “Playlist.”


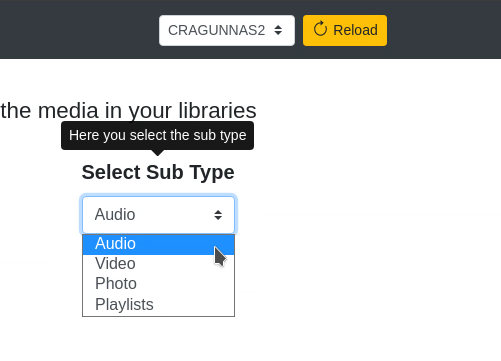
In Sub Type, I selected “Audio.”

Then you need to Select Media Library. The one I chose for this example is “Favorite Chill.”

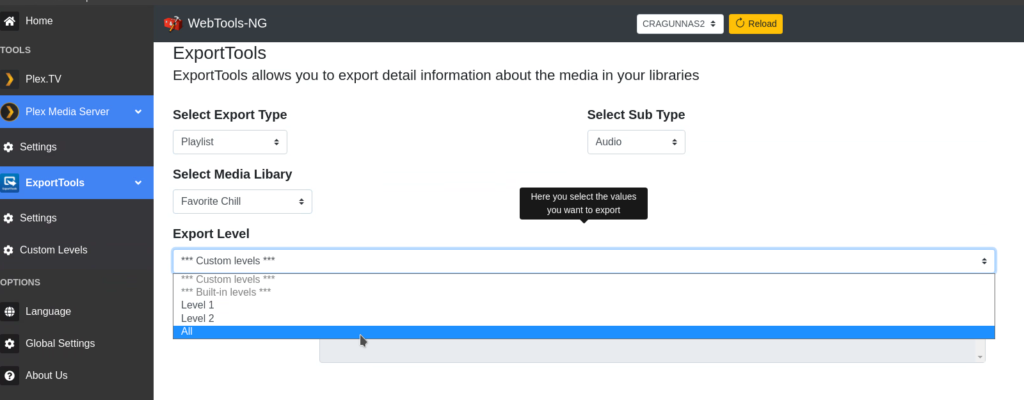
Finally, for Export Level, I chose “All” (FYI, I’m not sure what this does. I’ll mess around with it later.)

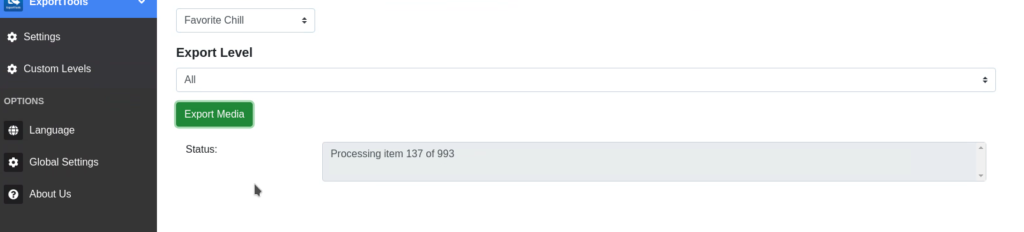
Then click “Export Media” and you’ll see the Status box light up with your export:

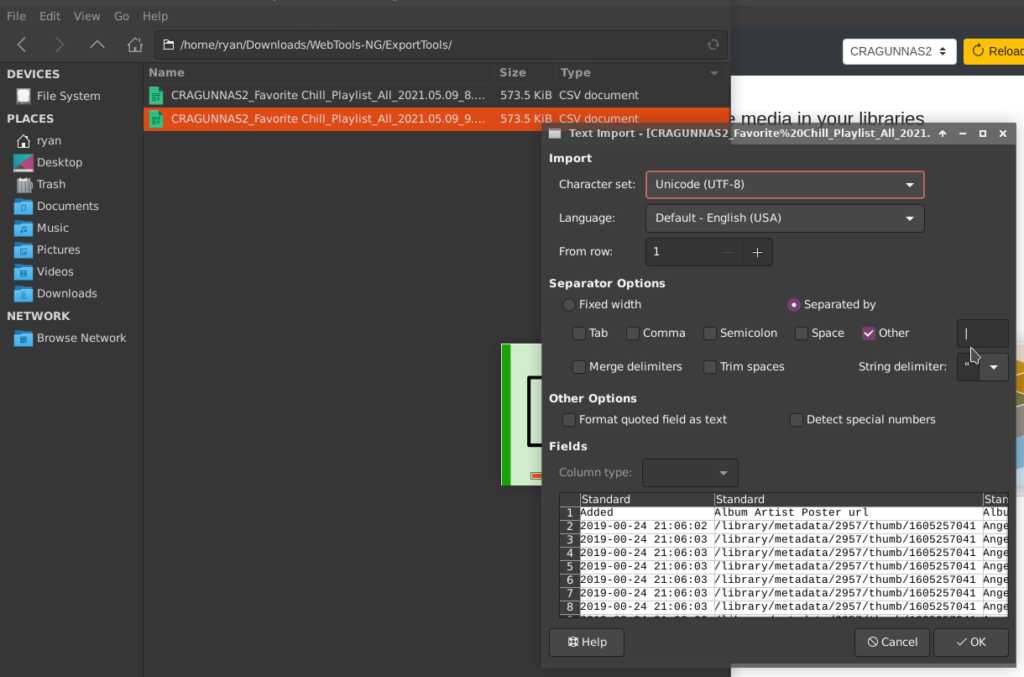
When it’s done, you’ll have a CSV file with all the relevant information from your playlist from Plex. You’ll open that with a spreadsheet program (I’m using LibreOffice Calc) for the next step. With LibreOffice, it asks for the delimiter (the Unicode character that separates data). By default in WebTools-NG, the delimiter is “|”. So, make sure you set that when you open the CSV file. Here’s how in LibreOffice:

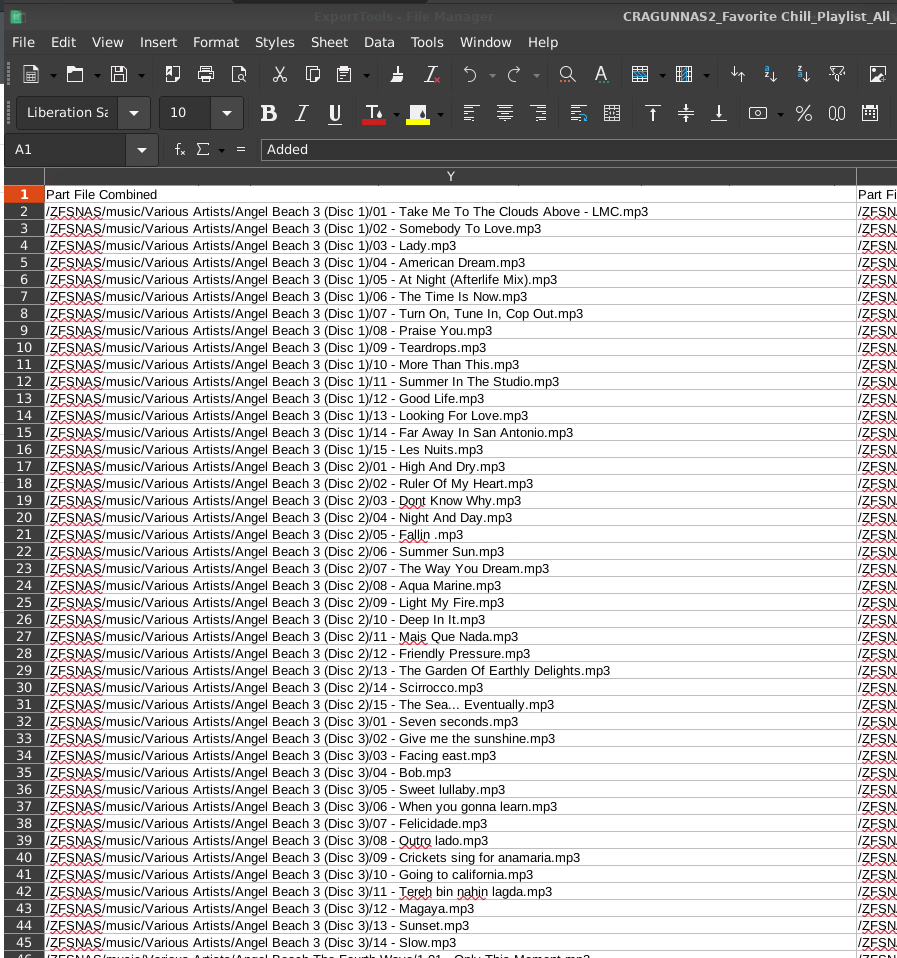
Once you’ve done that, open the file and you’ll see lots of columns with lots of information. To create an M3U playlist, we actually just need one column: “Part File Combined.” That has the location of the file:

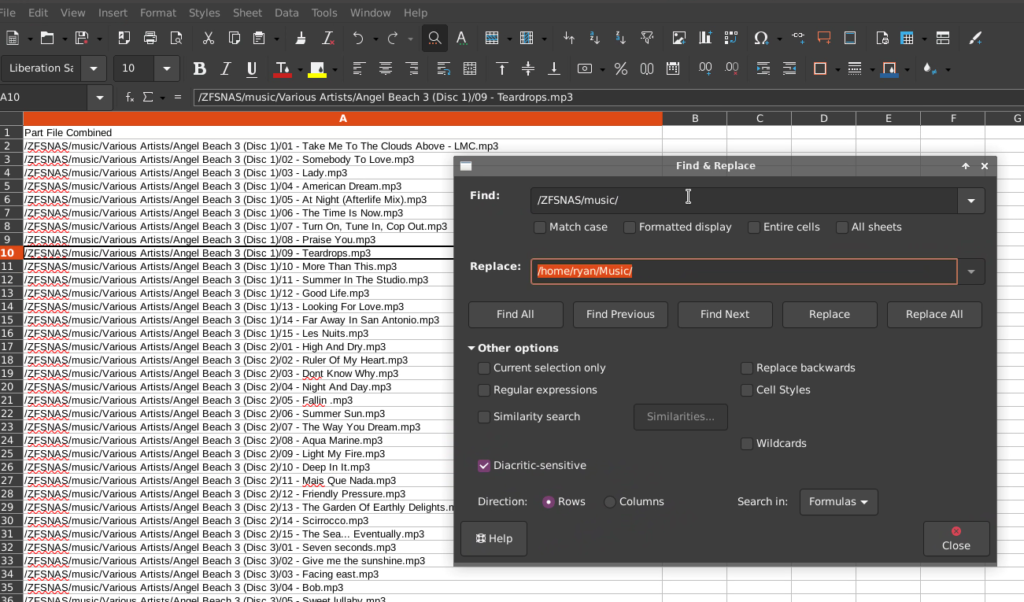
To make this as easy possible, I’d suggest deleting all of the other columns. Then, once you’ve deleted them all, you’ll need to do one additional step. Since the location of the music files is on my file server and is the absolute location (i.e., relative to where the OS is installed) and is not a relative location (i.e., relative to where the M3U file is stored), you’ll need to adjust that for where you are going to import your M3U file. Let me be a bit more specific. On my fileserver, my music is stored in a folder called “music” (keeping it simple). But that folder is stored on my ZFS raid which is located in the folder “ZFSNAS.” Thus, the absolute location of my music folder is “/ZFSNAS/music/”. That is different on my desktop computer where I am going to be playing the music. On my desktop computer, my music folder is loaded using NFS into a folder called “Music” but that folder is located in a different absolute location, “/home/ryan/Music/”. So, the final and perhaps most complicated step to creating the M3U file is to replace the absolute location from my fileserver with the absolute file location on my desktop computer. That’s easy enough with a Find and Replace command:

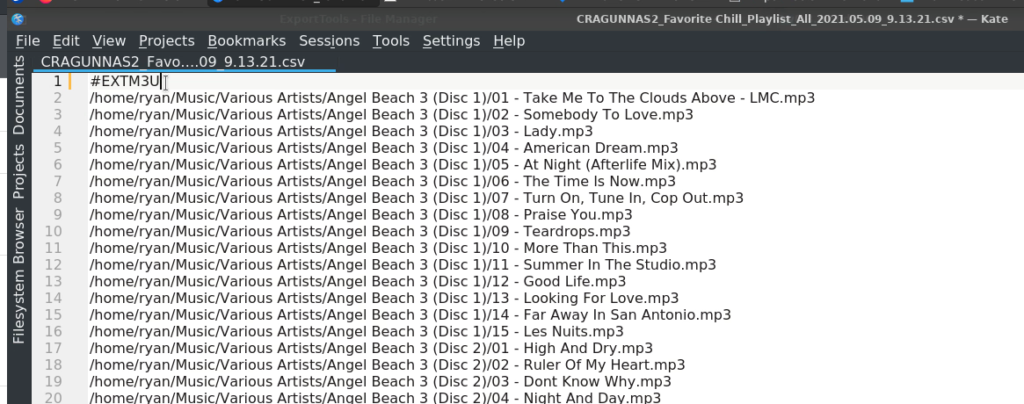
Once you’ve done that, creating the M3U file is super easy. Save your CSV file that now has just one column with a column header. Now, open that file with a text editor. I’m using Kate. Replace the column header “Part File Combined” with “#EXTM3U”. The file format for M3U file is pretty simple – it has to start with #EXTM3U then can literally just consist of the absolute file location of the files.

Then either save the file with the extension “.m3u” or close the file and replace the “.csv” with “.m3u”. You now have an M3U playlist!

The last step is to import the file into your other application. In my case, this is Clementine. First, open a new Playlist in Clementine. This is important because, when you import the M3U playlist, it will get added to whichever playlist you currently have active.
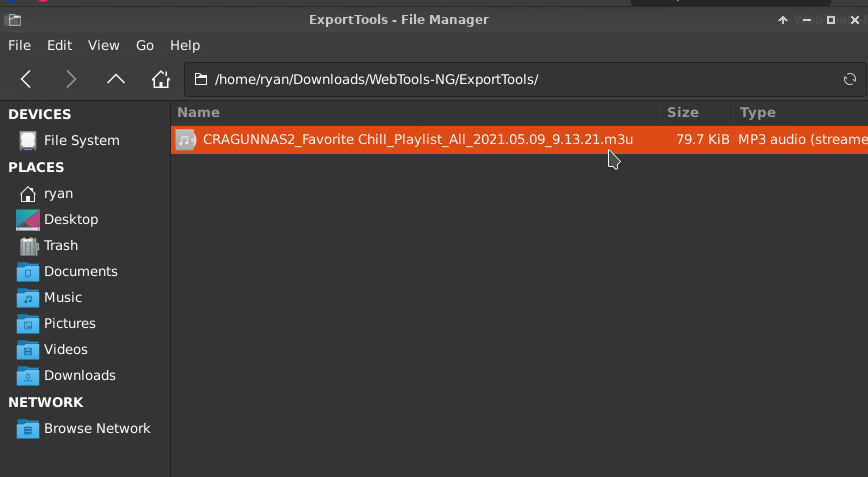
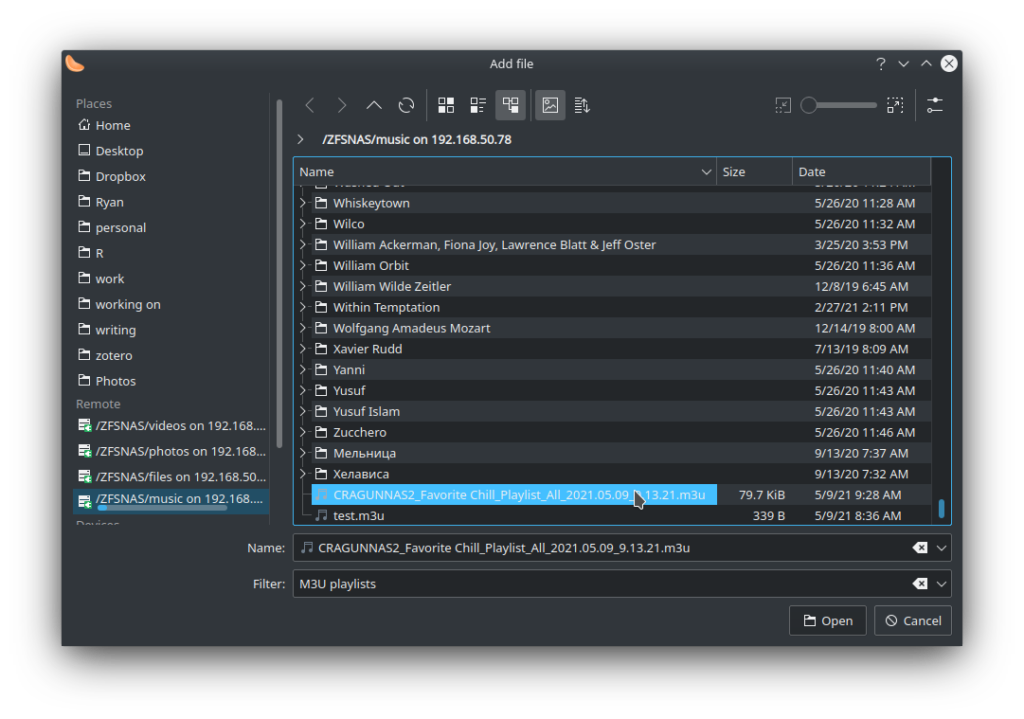
Then click on “Music” -> “Open File.” At the bottom of that window, choose “M3U playlists.” Find your playlist and select it. Then hit “Open.”

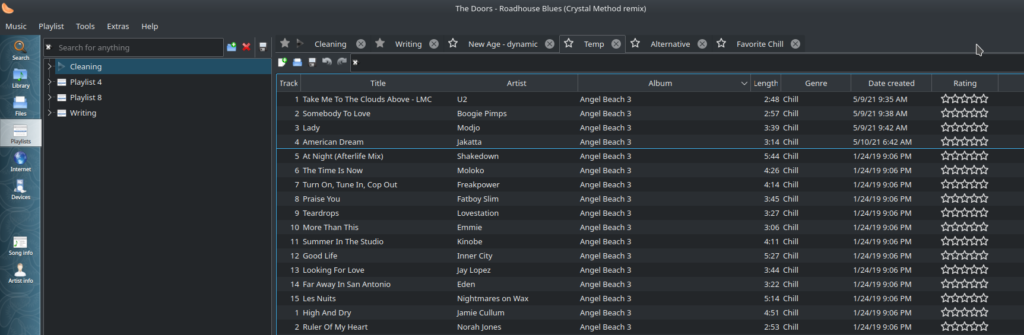
And there you have it – your playlist exported from Plex into Clementine:

If you want to save that playlist in Clementine, just click the “Star” at the top of the Playlist and it will get added to your Playlists. You can also save the playlist as an M3U file and Clementine will format it nice and proper.
Some notes…
This is a bit cumbersome. It sure would be nice of the folks at Plex to add a playlist import/export feature. It really wouldn’t be that hard to do this. A simple walk through process that first imports the M3U playlist then either (a) searches the audio library for matching files or (b) just cuts off the absolute location of the audio files and replaces that with the relative location for the audio library would do this.
I’ve noticed that not every song gets properly imported. I’ll probe that issue but I’m guessing it’s songs that have weird characters in their names that are problematic.
This is obviously just a one-way export feature. Right now, I have only figured out a way to export a playlist from Plex using a third application. I’d really love to be able to import playlists into Plex. If anyone has any thoughts on that, I welcome them. I typically create all my playlists in Clementine. For now, I have to go the other way for custom-built playlists that I want in both locations.
![]()
