I’m guessing most people who don’t use Linux have no idea how convenient repositories are. I’m a huge fan of how Linux has managed (and mostly continues to manage) software for quite a while: you open a console or the software manager on your computer, search for the software you want, and install it. The software packages are stored on a centralized server and are just waiting for you to select them. Then they are downloaded (lots of dependency checks take place in the process, of course) and installed. It’s super slick. No searching the internet for .exe or .dmg files.
In recent years, a growing number of software packages have been released as either AppImages, Snaps, or Flatpaks. I get the logic behind this: rather than having to build your software to rely on other libraries or packages that exist in the repositories that could get updated, breaking your own software, you can simply package everything needed for your software to run inside one file. It’s easier for the developer. There are also some security benefits, as most of these packages have restricted access to various elements of the operating system.
Would I still prefer just installing from a repository?
Yes.
But the world is changing, and some of the software I use is now only accessible as an AppImage, Snap, or Flatpak.
Every time I reformat my computer, I have to install several software packages that are now distributed as AppImages or Flatpaks (since I run a variant of Ubuntu, snaps are installed by default, but I’ll discuss them below). I never remember how to install and run AppImages or Flatpaks as these are typically one-time installs that last for months or even years before I have to do it again. Having upgraded all of my computers this summer, I finally decided it was time to post the directions for this on my website, so I can refer to them the next time I need to install and run one of these.
AppImage
You can read more about the history and structure of AppImage here (Wikipedia link). As noted, these are single files that contain the core software package along with most or all of the dependencies for the software package. AppImages are self-contained files that can be run as executables. Here’s how you do that.
First, while it may seem counter-intuitive, you need a software package to mount AppImages: FUSE. Install that:
sudo apt install libfuse2Then, download your AppImage. I’m using Bambu Studio, the slicer software for one of my 3D printers, as an example. I grabbed the AppImage here. Decide where you want to run the AppImage from. I put mine in a folder called “3DSoftware” in my “Home” folder:

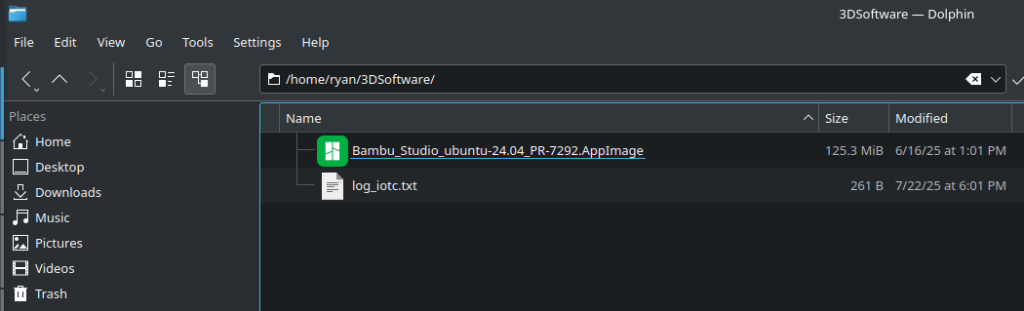
Once you have the AppImage where you want it, right-click it and select “Properties.”

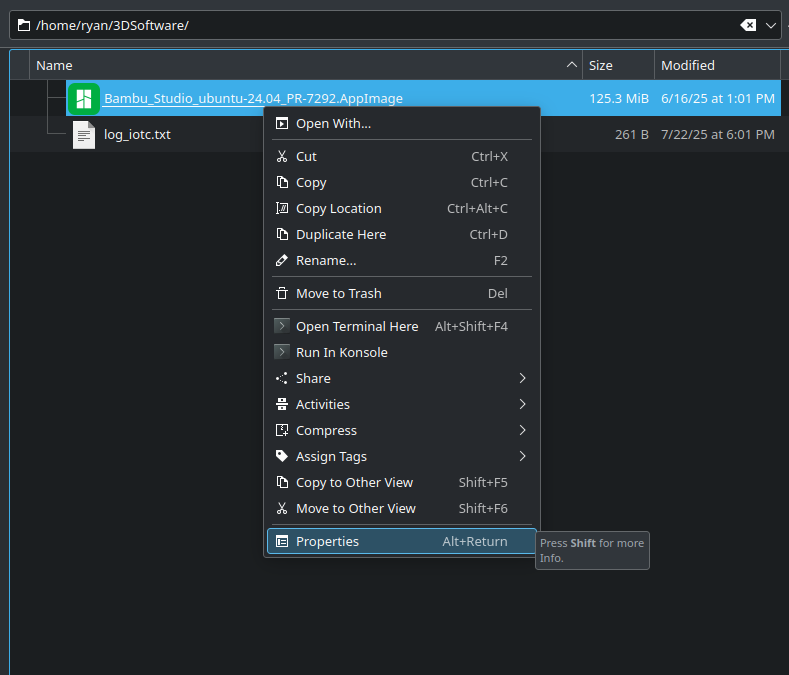
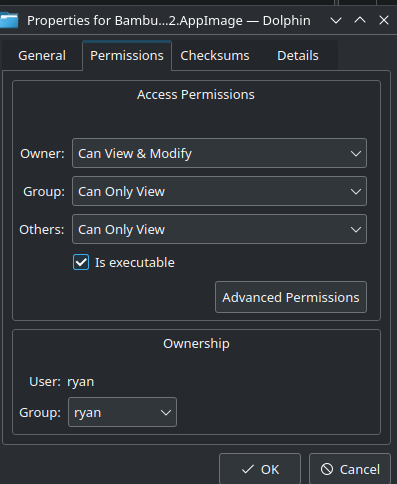
In the new window that pops up, click on the “Permissions” tab and look for the option “Is executable.” Select that so you can run the AppImage.

And now the part that I forget every time. It should seem like you could just double-click the AppImage now and it will run. Sometimes it does (if everything is working correctly), but other times it won’t. Nothing happens. But there is also no error. You just sit there, staring blankly at the screen questioning whether you clicked twice. If you clicked twice fast enough. And then you question the purpose of life, the universe, and everything. (Maybe that’s just me.)
If all of the dependencies are in place (there are still some with every AppImage), you might get lucky and it will just launch.
But if it won’t launch, you’ve got another option. Navigate to where the AppImage is located using “cd”, then use this command:
./[name_of_app].AppImageFor my example AppImage, here’s the command:
./Bambu_Studio-ubuntu-24.04_PR-7292.AppImage
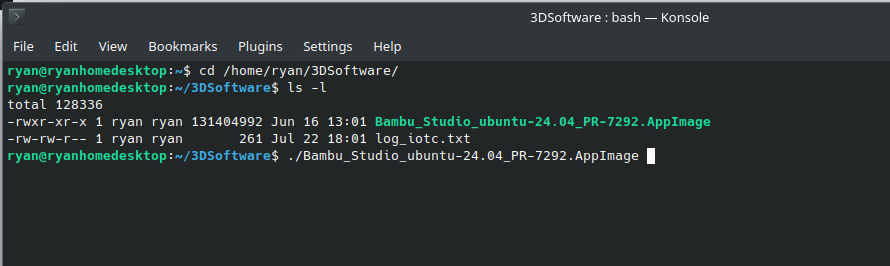
What this will likely do is show you what the software is doing to launch, and if it didn’t launch by double-clicking it, you’ll see the errors in the console. Solve those errors, and the AppImage should then launch if you double-click it.
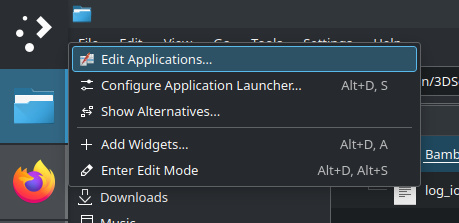
I typically also add my AppImage to my list of applications. Since I’m using Kubuntu, this is pretty straightforward. Right-click on the launcher menu and select “Edit Applications:”

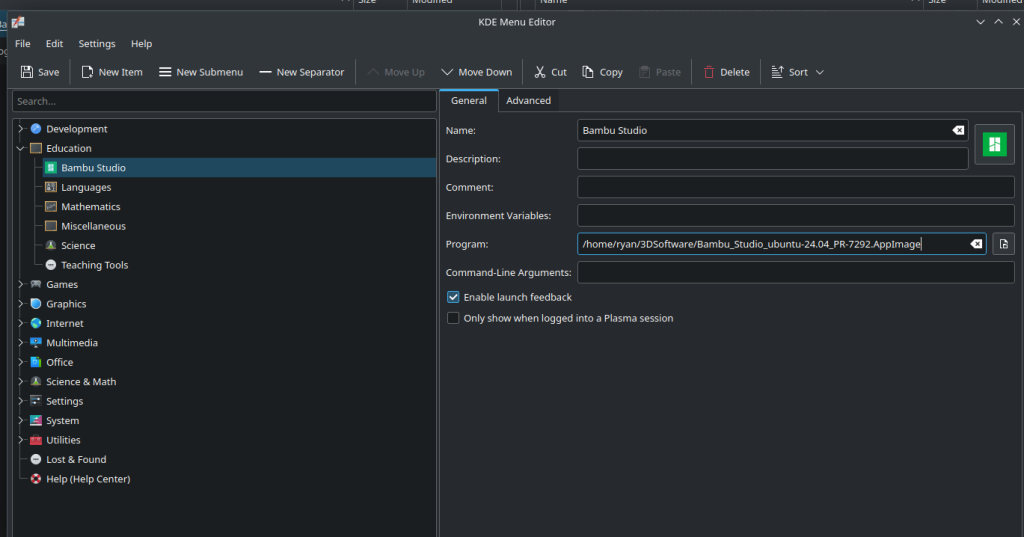
You’ll get a new window where you can add applications that you can then launch using one of the KDE shortcuts (e.g., F1 to open the launcher or Alt+F2 to launch using KRunner). Decide which type of application you have and where you want to put the application (this only matters if you’re searching through all of the applications). Then click “New Item” and add the information for your AppImage:

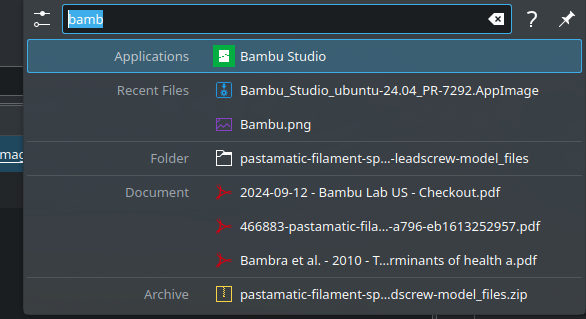
Once you’ve added the AppImage application to the Application menu, you can launch it from KRunner, making it function pretty much like any other application on your computer.

Flatpak
The basic idea behind Flatpak is similar to AppImages, but they are managed very differently. Basically, a software package is grouped together with dependencies/runtimes into a Flatpak, making it possible to install the application on pretty much any Linux distribution. But, unlike AppImages, Flatpak’s are installed completely differently.
First, you have to have install Flatpak support on your computer. This requires three packages that I find are most easily installed via the console:
sudo apt install flatpak plasma-discover-backend-flatpak kde-config-flatpakThat will make it so you can install Flatpaks. But, you’ll probably want the next step as well: set up Flathub as a place to find packages. That can also be done from the console using Flatpak itself:
flatpak remote-add --if-not-exists flathub https://flathub.org/repo/flathub.flatpakrepoThat means you can install Flatpaks directly from the Flathub repository. And, just FYI, with what those last two console commands, you can now install Flatpaks through Kubuntu’s Discovery Software Center. It usually works (but I’ve had mixed success).
If you want to install using the console, here’s how to do that. You can search for your application:
flatpak search [package name here]I’m going to use Flatpak to install another software package I use regularly for 3D printing, FreeCAD (which is awesome by the way). Here’s how:
flatpak search FreeCADHere’s what I get when I do that:


And to install it is pretty easy, but there is a counter-intuitive part. You don’t type in the application name. You type in the Application ID. In this case, that is “org.freecad.FreeCAD”. So, here’s what you’d type:
flatpak install org.freecad.FreeCADWhen you hit enter, you’ll get this:

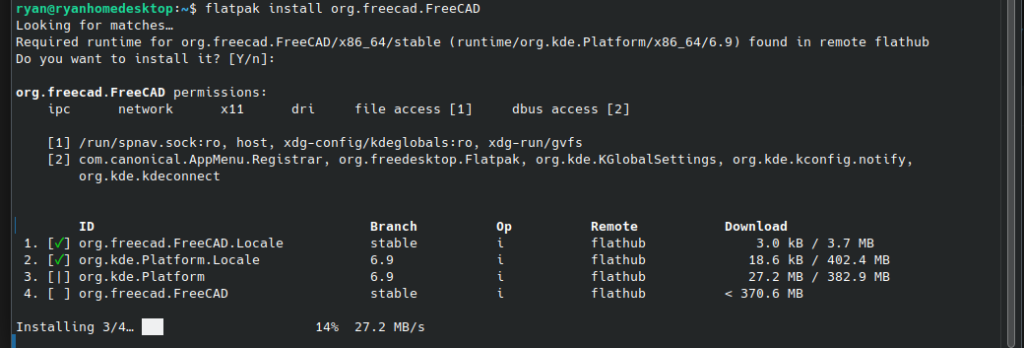
You’ll notice that it downloaded not just FreeCAD, but any other components it needs to install FreeCAD on your system. Unlike an AppImage, Flatpaks, once installed, will automatically show up in your Applications menu without you having to add them.


You can also run a Flatpak from the console, like this:
flatpak run org.freecad.FreeCADOnce you’ve installed one Flatpak, you can see all the Flatpaks on your computer with:
flatpak listThough you may want this instead, as it shows just the applications and not all the runtimes:
flatpak list --appTo uninstall an application, you can use:
flatpak uninstall [application ID here]For more options, try:
flatpak --helpSnap
Finally, we get to Snap. Snap is similar to the other two: it’s an application that is packaged with what it needs to run. It was developed by Canonical (the makers of Ubuntu). How you interact with it is more similar to Flatpak than AppImage, but there are still some differences. FYI, my first interaction with Snap was when I upgraded to 22.04, and Firefox and Thunderbird (and Chromium) were all shipped as snaps instead of just being in the repository. When that first happened, I had to figure out how to update the snaps because they wouldn’t automatically update, like they do now. I wrote a post about that because it was so annoying.
Anyway, here’s what you can do with snaps. If you want to search for snaps, you can use:
snap search [application]To install a snap, you can use this:
snap install [application]To list snaps, try this:
snap listTo update snaps:
sudo snap refreshFor more snap options, use this:
snap -help ![]()
